Showing posts with label techniques. Show all posts

Wednesday, 3 May 2017

BTEC L3 Photography Materials, Techniques and Processes – Photo-copy paper


Materials, Techniques and Processes – Photo-copy paper
 
Most of the student photography we see produced in their sketchbooks is now produced on photo-copy paper. So, this makes it one of the most frequently used materials that they use. With that in mind, it should be identified as one of the key materials that they use.

As with all of these materials, the first thing students should do is find the brand name of the paper they’re printing on and then go onto the manufacturers website by searching “Product data sheet” followed by the papers brand name…


You should go onto the website and download the product data PDF file for the paper you use in your college. Read the document identify the information relating to its properties and characteristics.

 General observations relating to these papers that you might include… (See over page).

·         Extremely cheap and economic.

·         Ideal for interim images and research images in sketchbooks

·         Ideal for reducing and scaling up using photocopier

·         Potential for mixed media application at basic level – finish is usually matt, so that the paper takes many mark-making media such as graphite pencils, biro’s even paint with the potential for buckling if used too wet.

·         Two basic sizes A4 and A3.

·         Comes out of the machine dry and with the image fixed.

·         Potential in art applications such as degrading and damaging, tears easily and works well with sellotapes for re-fixing and re-configuring.

·         Once screwed up maintains a 3D aspect.

·         Glues well.

·         Is semi-transparent so useful for over-laying and tracing.

·         Clean and white

·         Good for digital contact sheets.

·         Quick and easy.

·         Software on most advanced printing systems allows for nesting of images – MS picture viewer system had excellent nesting configurations for quick handing of images.

 Disadvantages


·         Buckles and distorts when used in conjunction with wet mark making media such as water-colour paints/gouache.

·         Not suitable for final images and portfolio use.

·         Images lack colour vibrancy because of the matt finish.

·         Easily damaged and ripped.

 Look at the relevant data sheets for further details.

To take this a step further you’re advised to use a number of different mark making media – pens, inks, high-lighters, different grade graphite pencils, paints – oil, gouache, acrylic, poster, water-colour; Different pencil types – charcoal, conte’, wax and other soft types and use them on the paper.

 Try smudging, smearing and wetting to show what effect you achieve with these media on this paper. Discuss what you have learned about the properties of the paper in conjunction with the potential of the mark-making tools/media. Is there any potential to use these media in conjunction with mixed media approaches in photography or combing the use of images and text?

Have a look at this link here too http://www.bbc.co.uk/schools/gcsebitesize/design/graphics/materialsandcomponentsrev1.shtml


BTEC Art and Design Photography - materials, techniques, processes and equipment - TLR camera


TLR camera (Through the lens reflex)


·         Firstly, this is a fantastic looking camera that draws attention to you as the photographer, and you simply using this camera says… I know what I’m doing, I’m an artisan with advanced knowledge of photography.

·         Looking down psychology. People don’t like being scrutinized through the lens of a camera. With SLR cameras, your face is on the same plain of focus as the lens and the subject often feels uncomfortable and uneasy about the apparent level of scrutiny implied through the use of SLR’s. With a TLR you focus with your face and head pointing and looking down and not at the subject. This has a potential effect in that they’re not so aware of being photographed and may feel more at ease and potentially a better result may evolve?

·         Prime lenses – they don’t use zoom lenses, all of the lenses that come with these cameras are fixed focal length and therefore prime lenses with better optics.

·         6cm x 6cm negative. This is a big negative that produces a very high quality image if used with the right films, processed correctly and printed on the right type of papers.

·         Focus on need to get the shot (12 frames). Again, this is another psychological factor, the whole process or making images using a camera that only has 12 frames per roll focuses the photographer’s attention on the job at hand. The process of making the pictures becomes slower and more measured and potentially better for it.

·         Requires use of hand-held meter – again another set of skills and it looks more professional and people potentially take you more seriously – you look like a photographer and you should be telling them you’re an artist… Digital photography is for snappers and amateurs.

·         Requires more advance knowledge of photography – filters out the cowboys and the wanna-be’s.

·         The square format also makes you think about the space in the image and creates further awareness of backgrounds in images.

·         Enables and encourages darkroom skills and a greater under-standing of the relationship between exposure, light and the print.

·         Enables you to shoot and create images in the style of the greats such as Avedon, Bailey and Penn through the use of techniques such as the inclusion of the border, again making you consider the frame. (Shooting full frame).

·         Working with such cameras demands and identifies more advance skill-set and increases potential to attain higher grades.


Disadvantage


·         12 shots on a roll – although can be seen as a positive aspect (See above)

·         Lens parallax error – what you see through the viewing lens doesn’t correspond with the ‘Taking lens’.

·         No internal metering system

·         Bellows extension factor – with different lenses at different focal lengths and the closeness of the subject, the camera has a bellows system to facilitate focusing which affects the exposure. This needs to be factored into the exposure calculations.

·         You have to know about film in order to expose properly.

·         Need to have access to 6x6 format enlargers.

·         Need to additional skill-set of processing and printing skills/knowledge to get full advantage.

·         Size and weight – cumbersome.
Cost factor - film is expensive, photographic paper is expensive too.
Environmental factors - Film and photographic paper is full of sliver and there are issues with regards to discarding Fix which is one of the key parts of processing procedure. http://www.who.int/water_sanitation_health/dwq/chemicals/silver.pdf

BTEC Materials, techniques and processes - Flatbed scanners and photo-copiers as a camera.

Flatbed scanners as a camera

Something that many people over-look is the potential to use flatbed scanners as a means to create images. See the two links below for examples...

http://katerinajebb.tumblr.com/
http://www.simonwardphoto.com/

Scanners produce good quality images at quite high resolutions, with a unique feeling of their own. Ideally suited to flat-copying, but they do have the potential to create renditions of 3D objects too. In addition because of the way that images are scanned by a slow moving capture system, there's loads of scope to play around with movement in conjunction with the images, creating potentially very creative outcomes.

  • Normally associated with 'Art' applications in photography, rather than commissioned photography.
  • Can be used adapt other types of photography for instance Pinhole photography produced on photographic print paper on small scale can be scanned at high resolutions and therefore digitized and scaled up.
Disadvantages

  • Lack of mobility, need mains supply.
  • Limited in their ability to render and record 3D objects
  • Requires expensive software packages such as Photoshop to work with at post production stages.
  • Limited to A4 capture size although A3 scanners do exist.

*Note - The photo-copy machines at college have a scanning function via the menu. Select the 'Scanning' option and click the 'email' option as well as the resolution and colour settings. Also choose what type of file type you want your scan to be sent to you as. I would generally opt for a TIFF file. Once your scan has been made, you'll be sent a digital file to your college email address.

BTEC Photography Materials, techniques and processes - DSLR cameras

DSLR Cameras - characteristics and their properties.

Why use one camera over an another, what are the benefits of using different cameras and how does it effect the image and meaning?

Within the context of your BTEC qualification this is a re-occurring question and one that you have to address. This post helps out with that aspect of the course. Remember though - do not copy this, read it and write it up in your own language and add to it, if you're looking to attain higher grades.

Digital SLR's

Why use one? One of the key reason's is that you're on a photography course and the majority of professional photographs are shot using a digital SLR and therefore as an aspiring photographer you need to be fully conversant with how your DSLR works. Other reasons include the following here in this list...

  • Versatile - DSLR's are extremely versatile and are able to cover most photographic jobs, they come with hundreds of attachments enabling them to be used for scientific photography in labs to under-water photography in situations such as Surf Photography using camera housings.
  • If you use either Nikon on Canon, you'll find that wherever you are in the world, there's usually somewhere near by in a big city that can service the camera and sell you components needed for your work.
  • They relatively cheap.
  • Small and light weight, relatively tough.
  • They're able to be fitted with a huge range of lenses going from super wide Fish-eye lenses to super long telephoto lenses used in sports and wildlife photography that cost thousands of pounds.
  • They're simple to use with auto and program modes that anyone can use.
  • They're extremely creative tools once you're able to work with them manually - over-riding the auto and program functions.
  • They use digital storage cards, usually 'SD' cards onto which literally thousands of images can be captured and stored. In comparison with shooting film this is a massive advantage both from a cost point of view and enabling you to get 'The image'.
  • Light colour in the image is controlled in-camera via 'White balance' settings - no need for sets of filters as the case for analogue cameras.
  • The images can be see on the preview screen on the back of the camera enabling checking of composition, white balance and lighting to some extent.
Disadvantages
  • There's a tendency for students to produce images from digital files using Photo-copy paper or poor quality and expensive digital prints using ink jet printers at home. So their prints produced for the assignments are very low quality with limited use.
  • Everyone thinks they're a photographer and people with very limited knowledge are setting themselves up as photographers, under-cutting real photographers and putting people out of business.
  • The fact that images are unloaded off the camera and then stored on digital devices and never seen. As opposed analogue cameras that traditionally when the film is processed you end up with hard-copy prints to be shown and shared between people - a more tactile sharing experience.
  • Technology advancements, with newer technology, sometimes the format of the files (Images) becomes so advanced that there are no longer computers/software that are unable to view the 'Old' outdated file types. This is in opposition to traditional photography and the use of prints.
  • Susceptible to damp, moisture, dust, grit, extreme cold conditions.
  • Reliant wholly on batteries.
  • SD cards and storage devices including Hard - Drives on computers, DVD's etc susceptible to corruption and all of the images lost.
  • So many images/files a great deal of time is required to catalogue and file them.
  • Perceived that you also need Photoshop as a part of the 'Package'. Photoshop cost several
Note - look up your own camera on websites such as www.dpreview.co and http://www.kenrockwell.com/tech/reviews.htm to find out the specific details about your own camera.

Wednesday, 4 May 2016

Light - identifying it, writing about it as a technical aspect of your work in college projects.

Photography... It's all about the light, if there is no light there is no photograph. If you're at college studying photography, you're studying light as well and with 2 years of work free study surrounded by lecturers that are experts in the art of light you need to be leaving college with some basic knowledge of light.

It's usually the case on a level 3 course be it A-Level, UAL or BTEC there'll be some requirement at some point where you'll need to discuss your use of light and why you've made the choices that you have with regards the light.

So what decisions and knowledge should you identify when writing about it, analysing it and planning it?

(1). What is the light source and what are characteristics of that particular source. If it's an artificial source, is it trying to recreate something in nature... Sunlight or moonlight, reflected light, scattered light, fire light, dappled light, diffuse or point light?

(2). Direction - where's it coming from and why, why are you choosing to shoot in that particular light? What is it doing for your subject, is it moody, emotive, dramatic, objective, neutral?

(3). Does it flatten the subject or does it model the subject e.g. pick up the shape, form and texture, do you want it to do one or the other, if so why?

(4). Refracted, diffuse, reflected, specular, point?

(5). If it's an artificial facsimile of a natural form of light, how have you achieved it and how close have you been able recreate its properties and characteristics - be explicit in your explanations, draw floor plans and photograph the set-up.

(6). Colour of light http://www.cambridgeincolour.com/tutorials/natural-light-photography.htm

(7). Lighting equipment - what did you use, why did you use it what are its pro's and cons.

(8). Inverse square law and its application in photography - how does it help you and why do you need to know about it, how have you used it?

(9). Reflected light - controlling light in the studio using zones and inverse square law.

(10). Artificial light sources, their characteristics and properties.

(11). Studio flash, modifiers, dishes, soft boxes, snoots, diffusing screens, reflectors, umbrellas all the equipment and its characteristics and properties.

(12). Studio space, heights, distances, widths and walls... why?

(13). Influence - whose lighting technique and style are you borrowing from, your analysis of their approach.

(14). Deconstructing and analysing other people's lighting using visual clues.

(15). Ratios - between highlight and shadow, masculine and feminine lighting.

(16). Masters of lighting - classic lighting techniques used by painters.

That's some of the easy stuff.

Use these prompts above and your notes from over the first year when all of this was covered, discussed and used in practice. (That's if you're on one of the courses I deliver).

Tuesday, 4 March 2014

Mixed Media - digital + Charcoal, chalk and scratching.

http://www.listofphotographers.blogspot.co.uk/

Incomplete more to follow.

But briefly - Get a digital image, get it printed onto card, cartridge paper or some other type of art paper. If you're really desperate bog standard paper.

Then play around with it, making it look darker and moodier, scratch the surface, smudge it - just work with it and see what you come up with. Use chalk, conte pencils, charcoal and coloured chalk and it'll start to come together and become something very different.

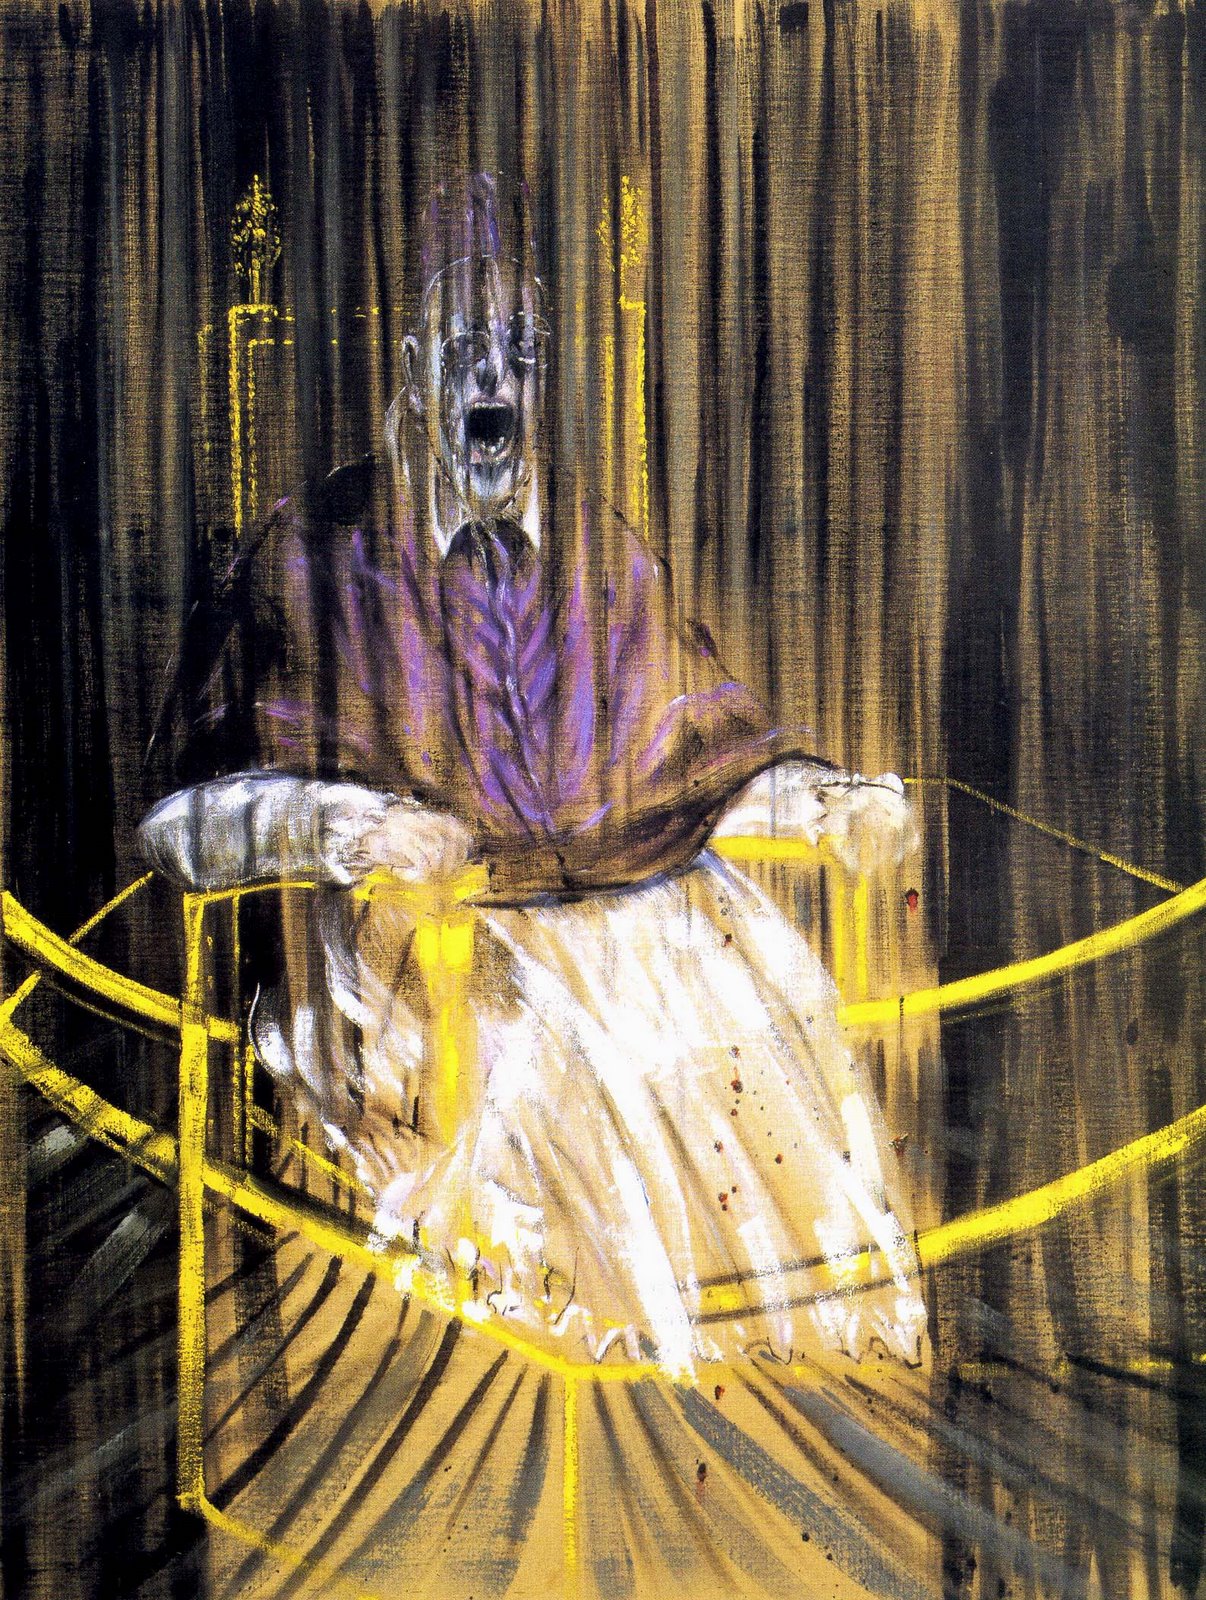
http://www.arbreriefantasy.com/IlluImgStock/87/ShyChristopher_csdi14.jpg

http://upload.wikimedia.org/wikipedia/en/archive/f/f4/20100830193250!The_Scream.jpg

http://markmcleod.org/wp_clevelandstateart/wp-content/uploads/2014/02/screaming-pope.jpg

This also offers and opportunity to bolster most aspects of your work - you could work with the technique as a mini - project...

Look at the example here (Image to come) and read the blog content here and write a quick proposal saying what you intend to do. Then write a short plan - times, dates, schedule materials etc.

The research the artists above and identify what 'Expressionism is'. Write up a definition and then commit to producing an image that has elements of expressionism within it using this mixed media technique.

Once you've done the research and the plan/idea becomes more coherent - produce a Gibbs reflection and the start making pictures.

Record what you do, keep all the experimental versions of the work you make and refine the work - coming up with an approach that suits your work. If you work at it with different images you may find that you come up with something that works exceptionally well. It may mean you have to do a re-shoot?

Once you've produced some images - then do another Gibbs reflection and say whether it works as a final idea for your poject. Even if you reject it, you would have still produced some images that will be good for your workbook/portfolio that shows you've explore photography and art further.

Saturday, 14 December 2013

Approaches to producing images - Typology

http://www.listofphotographers.blogspot.co.uk/

Typology (Work in Progress)

This is one of the approaches we cover and teach you about.


Typology is an approach where you focus on 'Types' and produce a series of images in sets, often presented as a composite on one single piece of paper, e.g. an A3 print with 9, 12 or 15 images or more. Alternatively the images can be produced singularly and then displayed as a set at the end of a project.


Within your longer projects, whereby you have to explore and experiment with different approaches in producing your images, this is one of the approaches that you can evidence in your work that has excellent opportunities to link with high quality research that evidences key points in Photography history. Typology also allows you to discuss several other elements in conjunction with the images/approach. If you look at Bernd & Hiller Becher, this will allow you to explore and discuss Objectivity Vs Subjectivity maybe linking with Deadpan and other artists such as Thomas Ruff and looking at the links his work has with Photobooth images and the imposition of a set of rules that takes the subjective elements out of the image taking process.


Other artists that you should look at directly linked to Typology are James Mollison and two of my Favourites Jeffrey Milstein and Alejandro Cartagena.


Jeffrey Milstein (Planes).
 
 Jame Mollison (James and Other Apes)
 
The images here all use relatively simple approaches with the exception of the Bechers, the Bechers would have used 10x8 view cameras, film and darkroom approaches. Similarly you have to make decisions as to whether you want to keep things simple and produce the work at the experimental phase using your digital cameras, but once you've produce your work in a number of different ways you might consider shooting your work using the Typology conventions and perhaps explore producing it with another experimental approach, or use film and Darkroom/analogue techniques.
 
Pinhole camera (As a Typology)
Mixed Media (As a Typology)
Liquid emulsion (As a Typology)
Images & Text (As a Typology)
 
All of the artists mentioned here have either been featured in recent Journals or have Youtube videos where their work is discussed and explained by either the artists or someone qualified to do so.
 
In terms of difficulty, this is a relatively easy approach with the potential to produce visually interesting outcomes that meet a great number of your learning outcomes required to attain the higher grades. Needless to say at the end of any work that you produce around the theme of Typology you should then reflect on the work that you've produced and consider it as a possible method of producing your final body of work. Because of the potential of Typology and the fact that it can be easily mixed with a range of different approaches, this could also be the main thing your project could hinge around and explore and could easily serve as your starting point for any independently led project?
 
Additional photographers that work using the Typology approach can be found here - http://www.listofphotographers.blogspot.com/


Wednesday, 4 December 2013

Experimental/Alternative approaches in Photography

(Work in Progress). Here's a list of suggestions of a variety of different ways you could approach your work moving it away from purely digital and straight photography approaches. On your A- Level there is a requirement to explore a range of different and experimental approaches within your work.

Mixed Media - Victor Sloane, Peter Beard,

Subjective v Objective

Pop Art  - Julian Opie, Andy Warhol

Expressionism - Ernst Haas, Alfred Stieglitz (Equivalents),

Impressionism

Abstract

Minimal

Narrative

Voyeuristic - Merry Alpern, 2,

Deadpan - Tereza Vlckova Thomas Ruff, The Bechers,

Typology - Bernd & Hiller Becher, Jeffrey Millstein,

Topography

Pinhole - Barbra Ess, Gina Glover,

Tilt Shift - Slinkachu

Liquid Emulsion - somebloke

Cyanotype - Anna Atkins, Wig Sayell,

Repetition Andy Warhol,

Degrading & Damaging - Ed Burtynsky (Chittagong Polaroids), Sally Mann

35mm & Darkroom techniques -

Abstraction

Joiners - David Hockney

Images & Text - Peter Beard

Found images -

Comic Book - Sin City, Ah Ha (Stand by me video).

Colour - Evzen Sobek a life in Blue

For more check out the list of photographers - CTRL + F and search "experimental" http://www.listofphotographers.blogspot.com/