Showing posts with label GCSE. Show all posts

Monday, 31 October 2016

Materials, techniques and processes - ideas and things you can do - Mixed media photography.

Do this - Get together paints, pens, pencils, chalks, crayons, biros and any other method to draw onto a 'Support'. The term is usually applied to painting and drawing and refers to the medium onto which you can draw/paint etc. The same term can be used in the context of photography because we too paint onto the surface in different ways - sometimes directly, as in the case of Arnulf Rainer


As part of this process we as the 'Artist' have to explore the use of how the 'Mark-making' tools work in conjunction with the 'Support' and make judgements as to whether the combination of both is successful. You have access to a number of ways in which you can produce your images - digitally and traditionally. Some of you may have access to additional methods such as 'Ink Jet' printers at home so have a larger range of potential supports for your experiments.

With a broad selection of mark-making materials...

HB pencil
2 B Pencil
4 B Pencil
Biro
High-lighter pens
Chalk
Charcoal
Water-colour paint
Goache paint.
Poster paint.
Oil paint.
Acrylic paint.
Coloured pencils
Conte pencils
Water-colour pencils
Fine-liners
OHP pens
Permanent markers
Dry wipe board markers

Get all of the supports that you have got access to... Search out or use the hyperlinks here to find more information on the characteristics and properties of these papers. Record this information with samples of the different papers/supports...

Photo-copy paper more here
Photo-copy card (CRU)
Ink Jet paper from home
Kentmere VC Select

And try all the different mark making materials (pens/pencils/paints) on the surface. Number each one and then write up your observations of how they work in conjunction with the support. Again describe the characteristics of the materials - thick, runny, oily, fine, watery, translucent, opaque etc. Does it react with the paper, or sit on top of the paper, does it rub off or is absorbed, is it neat or untidy, does it look like it has potential or does it look unprofessional.


Watch these videos here


https://www.youtube.com/watch?v=YnDaY14SRpM Nudity warning
To see the potential for some of these techniques.

Sunday, 10 November 2013

6126 Y01 - UAL Unit 4 & Unit 5 - MTP's Assignment (Portraits).

www.listofphotographers.blogspot.co.uk

Work in progress

Unit 4: Introduction to materials, processes and technical skills
Unit 5: An integrated approach to 2D problem solving

In essence this work has 3 key components to it...

(1). The Research section that needs to be completed within the first 2 weeks.

(2). The workshop component (Experimental techniques) which is on-going throughout the duration of the project.

(3). Your own personal project, that must connect to your research and be developed, improved and refined over 3 or 4 stages, culminating in the production of 4 final high quality images that incorporate one of the experimental techniques that you've worked with in the workshops.

Section 1 - Research


Monday, 15 October 2012

Referencing guidance

www.listofphotographers.blogspot.com

Within your research work, you will need to reference your sources in a bibliography. There's loads of guidance out there which is fairly confusing and contradictory and some of your lecturers are going to get hot under the collar if you get it wrong. If you've got those kind of lecturers and perhaps you're on a degree you may want to ignore this blog and search elsewhere under the heading Harvard Referencing

But if you're on a level 3 course and just starting out we'll be more than happy if you do the following...

As you identify the websites, books and journals you're going to source you research from (Including images) you need to keep a list at the end of your blog entry that lists these. This is referred to as your Bibliography...


Websites (images) Have a brief description of the image and then the HTML link and the date that it was accessed. You could group all of the different types together...

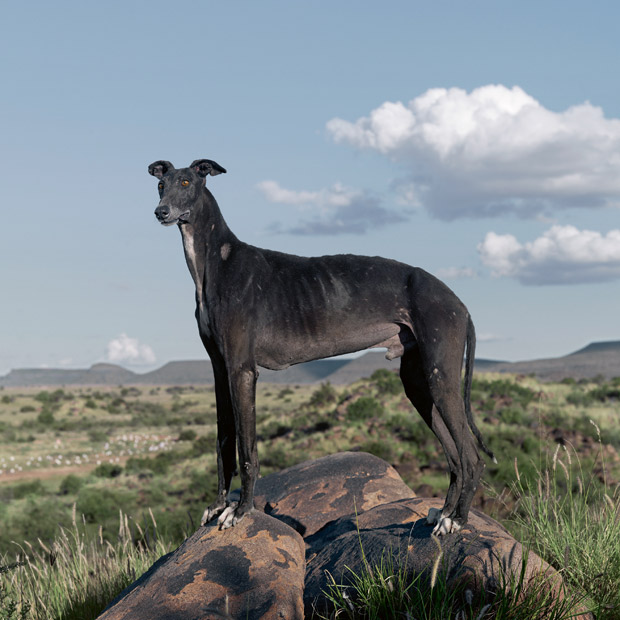
Image- Africanis Dog, Danielle Naude; http://static.guim.co.uk/sys-images/Arts/Arts_/Pictures/2013/7/31/1375271390007/Daniel-Naud--dog-photogra-008.jpg  26th Jan 2015.

Websites (Written material) Again state the Publisher and the theme, the HTML link and the date it was accessed as below in this example.


Text - The Guardian Danielle Naude article "Africanis". http://www.theguardian.com/artanddesign/2013/aug/01/daniel-naude-best-photograph-dog 26th Jan 2015

Books With this start with whether you've used the resource for text or image based reference material. Give a brief description of what was used, then follow with the Title, Author, date of the publication (On the inside page) and the place where the book was published and the publishing group. If you've copied images from the book state at the start whether you've used images or text.

Text - Article about The Bechers, (Page 402). Photography The Whole Story; Juliet Hacking & David Campany; 2012; London; Thames and Hudson.

Magazines/Journals With this start with whether you've used the resource for text or image based reference material. Give a brief description of what was used, then follow with the Title, Author, the page the image was copied from, the magazine title and issue number and date and where the magazine was published. If the magazine is published by a publishing group include that at the end.

Image -  Couple dancing, from series 'Poem' By Charlotte Tanguy (Page 26). British Journal of Photography, Issue 7824 (May 2014). London. BJP.

One of the secrets to blagging references at level 3 is to be consistent in the way that you do it, follow the same approach with every reference. Needless to say, if your lecturer suggests another way, go with their advice.

Quoting Text within your written material This is something we're always asking for and expect you to include in your work. It demonstrates that you're reading the research material and comprehending it and then using it in your written work to support your arguments and points of view. First some guidance about how to use quotes in your work...

  • The quotes should constitute no more than 10% of your written work.
  • They need to be clearly identified and obvious from the main body of text, much in the same way as this list of instructions is by use of indent.
  • Use inverted comma's to indicate the quote, use italics, separate the quote from the main paragraph.
  • Then follow it up with the reference using pretty much similar conventions as above...


In the image here we see that above (1) the text/writing is to the left and then the sentence leads us into the use of the quote. We identify that this is a quote at (2) by first indenting the text to the right slightly and with the additional use of the inverted commas. (3) The main body of the text is slightly smaller and again this is useful as it helps to show that this section is different e.g. a quote. Then finally the quote is referenced at (4). In this instance a website.

This same approach should be used in your blog or any written material. In a blog, especially if you're using Blogger you can create the indent with the use of a bullet point at the start.

Again I have to reiterate this may not be degree level referencing, but for level three this will suffice (Subject to the demands of your course specs and teachers).

Friday, 24 February 2012

Section 4 - Research

http://www.listofphotographers.blogspot.co.uk/

Here's some ideas on the theme of your research...

Research (Also check out this newer link on research here)

Right from the very outset we will be advising you to look at contemporary and historical photographers primarily exploring their ideas and reasons for shooting their images in the manner that they do. We strongly advise that you do not use the Internet as your starting point, as this tends to produce superficial and weak research material. The advised approach that we'll introduce you to, is to use Photographic Journals such as the BJP, allocating a little time each week to look at the new issues of each of the magazines and getting ideas together and gradually building a knowledge bank of contemporary and historical photographers and their work.

Using this approach you would be introducing yourself to a very broad range of photographic approaches and establishing a far greater depth and understanding of photography's potential. You should make notes and photo-copy interesting images and articles and get to grips with the language used and the ideas and concepts that are explored through photography.

We cannot stress how important it is to use the resources in the library (Journals, magazines and books). By virtue of being published in hard copy, the information in the articles is written by professional editors, writers, reviewers, academics and other artists and therefore of a much higher calibre. The nature of the articles in the magazines, books and journals tends to be far more concise and to the point, addressing all of the necessary components of your own research.

Your research should be conducted in two forms... (1) Initial Research (2) On-going Research.

(1). The initial research under-pins the project and should be the element your work is based on and around. We suggest that you explore 3 artists that connect with your idea and as part of that process you would ideally make a decision about your idea quickly connected with one or more of the artists/photographers you research. This part of your research has to be done at the start of your project and this is the reason we advise you to be continually looking at contemporary art photography throughout the course and building up a knowledge bank of sources to which you can turn to and use in conjunction with your work.

Throughout the duration of the course you're expected to experiment with your images using experimental in camera and post production techniques to enhance the meaning behind your images. One of the more difficult aspects of this is, the fusing together of your concept and the experimental approach. In order to increase your chances of being able to unite the idea and the experimental approach is to have a very wide appreciation of photographers that use these approaches and their techniques and how they use them together. This knowledge will only be gained through studying and researching contemporary art photography (The journals in the library) and seeing how and why they do it.

When you're looking at artists associated with your theme/approach the key things you need to identify are...

  • What is their work about (Its meaning)
  • How is the meaning conveyed in their images
  • If they use experimental techniques/approaches within their - work how does this enhance the images
  • Who are they influenced by - show how/why
  • Is their work a part of a continuing tradition
  • Where and how are their images used
  • What influences you are going to draw from their work
Use one A4 'Key' image in full colour, as high quality as you can source. Annotate this image identifying the Visual Language used in the image. For each artist aim to write in excess of 300 words describing the above bullet pointed aspects. Add additional images (In colour) to illustrate any points that are important and use quotes from books and journals in addition to the 300 words.
 

Then compare and contrast the work of at least 2 of the artists that you research again looking to write another 300 words,
 
·         What is the idea/concept behind the artist/photographers work?

·         Read the articles and look at the images – what is the work about, see the list below describe how it links in with one of these or another and say why the artist or you think it’s important or interesting.

o   Self

o   Space/places

o   Time

o   Religion

o   Sex/gender

o   Society

o   Conflict/War

o   Family/Kinship

o   The mind/mental illness

o   Violence/crime

o   Disease

o   Politics

o   History

o   Nature/environment

o   Confusion

o   Escapism


·         What materials, techniques and processes are used and why?

·         How big is the work – scale and size, how might this affect the way that it’s perceived?

·         Over what period was the work made – is this relevant?

·         Where are these images seen and used – how are they used – what’s their purpose?

·         Who or what is the work influenced by?

·         What’s been said about the work by art critics, curators, reviewers and other artists?

·         Is the meaning behind the work “Obvious”  or “Ambiguous”?

·         Have you been able to grasp the meaning behind the work – what do you think about it?

·         What have you taken from the research and applied to your own work (Idea/Concept or Practical/visual) elements?


 If you're struggling with ideas/concept based photography, have a look at this video as it may help... (
Photography as contemporary art)

Once you've made a start on the research and you've looked at some contemporary photographers and their work that has some link with your initial idea. You need to now outline a plan - what you're going to do next...


Contemporary Photographers

www.listofphotographers.blogspot.com

Visual Language in Photography

http://www.listofphotographers.blogspot.co.uk/

Visual Language in Photography

Visual language in photography relates to visual elements contained withing an image that we're able to read and make sense of that communicate ideas and meaning. 

Your introduction to Visual language will usually include the use of an image of Kylie Minogue shot by Derek Ridgers, in the session we deconstruct the image, analysing it, using the list below. Through this process we arrive at a series of deductions that allow us to speculate as to why the images exists, what it's purpose is, how it was shot, why it was shot in that way, what equipment was used, whether the image is natural or constructed, who the audience is, how the image communicates to that audience specifically and a whole raft of other aspects that give us a far greater understanding of what photography is and how it communicates.

Through this deconstruction/analysis process, we can see what visual langauge tools the photographer uses and bit by bit, we come to understand that images that seem to have just been 'taken' are in fact carefully constructed and designed in order to maximise their impact on the audience.

Another set of images that we look at are Thomas Ruff's deadpan portraits. We discuss the difference between the portrait of Kylie and Ruffs portraits in terms of the images being subjective or objective.

Within your work you will need to show that you've analysed two or more of your key research images. The suggestion is that you produce 2 high quality images in conjunction with your research and print these off A4 in size and in full colour. These images should be annotated using some of the prompts listed here below showing that you understand how images are constructed. In addition to the annotations that accompany the A4 images, there should also be an in-depth written component as part of your research that uses additional images (Smaller) where you attempt to analyse the images fully using as may of the prompts below discussing why these elements are used and how they could be used and incorporated into your own work.

• Subjective/Objective?
• Flat or contrasty - tonality
• Mono-chromatic, colour contrast or discord
• Composition - line - rule of thirds
• Format - Landscape/Portrait
• Texture • Light
• Mood • Location - scene -set
• Background
• Use - documentary; social; fashion; landscape; portrait, advert, art, editorial
• Production values - size, format, quality
• People -persons - who, what, when, why, how
• Expression/body language
• Involvement
• Meaning - message - semiotics
• Constructed/reality
• Purpose
• Target market and audience
• Props
• Socio-economic factors/Class
• Western or Non Western - cultural values
• Sexism, rascism, patriarchy
• Educational or commercial
• Art bias - expressionist, impressionist, abstract, minimalist
• Inspired by and following in the tradition of
* What if the image was colour/B&W?

An additional method of deconstructing the images and making sense of them can be found here.  This is a 13 point questioning approach that uses a system based on one used at the Tate Modern.