Showing posts with label AS level. Show all posts

Monday, 31 October 2016

Materials, techniques and processes - ideas and things you can do - Mixed media photography.

Do this - Get together paints, pens, pencils, chalks, crayons, biros and any other method to draw onto a 'Support'. The term is usually applied to painting and drawing and refers to the medium onto which you can draw/paint etc. The same term can be used in the context of photography because we too paint onto the surface in different ways - sometimes directly, as in the case of Arnulf Rainer


As part of this process we as the 'Artist' have to explore the use of how the 'Mark-making' tools work in conjunction with the 'Support' and make judgements as to whether the combination of both is successful. You have access to a number of ways in which you can produce your images - digitally and traditionally. Some of you may have access to additional methods such as 'Ink Jet' printers at home so have a larger range of potential supports for your experiments.

With a broad selection of mark-making materials...

HB pencil
2 B Pencil
4 B Pencil
Biro
High-lighter pens
Chalk
Charcoal
Water-colour paint
Goache paint.
Poster paint.
Oil paint.
Acrylic paint.
Coloured pencils
Conte pencils
Water-colour pencils
Fine-liners
OHP pens
Permanent markers
Dry wipe board markers

Get all of the supports that you have got access to... Search out or use the hyperlinks here to find more information on the characteristics and properties of these papers. Record this information with samples of the different papers/supports...

Photo-copy paper more here
Photo-copy card (CRU)
Ink Jet paper from home
Kentmere VC Select

And try all the different mark making materials (pens/pencils/paints) on the surface. Number each one and then write up your observations of how they work in conjunction with the support. Again describe the characteristics of the materials - thick, runny, oily, fine, watery, translucent, opaque etc. Does it react with the paper, or sit on top of the paper, does it rub off or is absorbed, is it neat or untidy, does it look like it has potential or does it look unprofessional.


Watch these videos here


https://www.youtube.com/watch?v=YnDaY14SRpM Nudity warning
To see the potential for some of these techniques.

Friday, 13 December 2013

Recommended web links


This is probably the best photography website ever...

www.americansuburbx.com  check out the 2 tabs at the top 'Artists' and 'Browse'.

Dazed & Confused on-line presence?

http://www.dazeddigital.com/photography/article/17626/1/low-and-behold

Learning resource for higher order thinking skills (Generic)

http://www.in2edu.com/resources/thinking_resources/blooms_taxonomy_chart.pdf

This is a useful link to a blog compiled by a lecturer at a college in the UK

http://artandphotography-uog.blogspot.co.uk/

Sean O'Hagan at the Guardian

http://www.theguardian.com/profile/seanohagan

Massive list of Photographers searchable by theme/subject/content especially useful for students.
http://www.listofphotographers.blogspot.com/


Monday, 18 November 2013

Studio Stuff - Basics

Studio basics (For inspiration & ideas check out http://listofphotographers.blogspot.co.uk/ )

Here's some guidance regarding using the studio.

Equipment - The list here is broken up into 2 sections the first part is a minimal approach and the second section is my recommended full list and the third section is for 'Hardcore' serious students that are seriously interested in learning Studio lighting techniques.

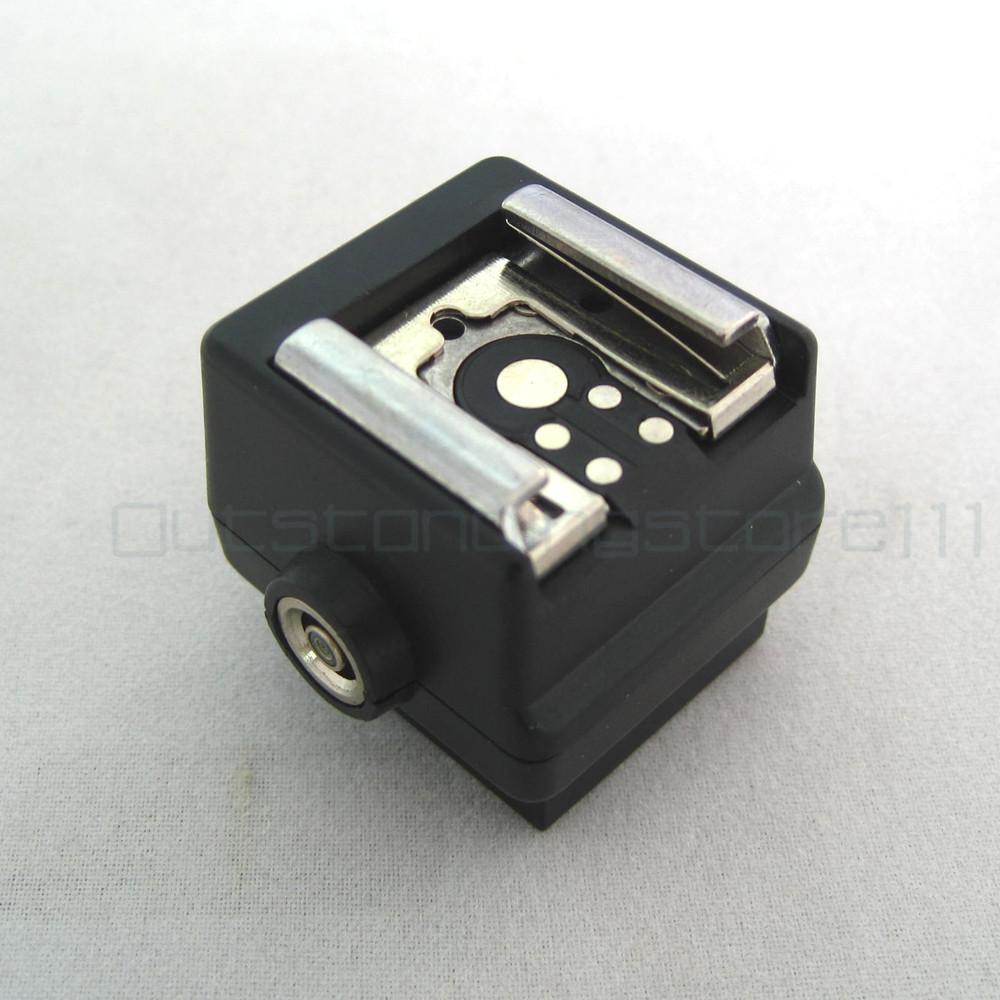
  • Hot shoe adapter
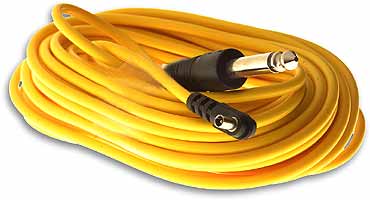
  • Sync lead x 2
  • Sekonic L308 light meter
  • Tripod adapter
  • Tripod
  • Camera
  • Lens with focal length of 55mm or longer


  • Tool box - Pliers, wire, screws, blue tac, string, fishing wire, a range of tapes, long nose pliers, nails, bulldog clips, crocodile clips, pegs, drawing pins,

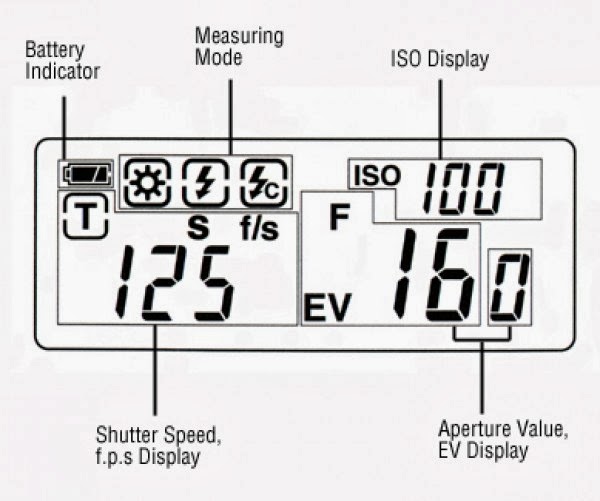
Work in Progress Sekonic L308 flash/light meter.


 Basic set up in the studio.
 
You need to set your camera up ready so that it's configured for studio use...
 
Set your camera to Manual
Set your ISO to 100
Set your white balance to Flash
Use a focal length between 55mm - 70mm (DSLR)
Set your shutter speed to 1/125 (DSLR)
Consider using Manual focus
 
Now configure the Flash Meter for use in the studio...
 
1. Set the Invacone so that it is in the position as in the image above (e.g. covering the sensor). The invacone is the white dome on the front of the flash meter.
 
Starting at the top of the meter - press the power button and the LCD display will come on.
 
2. "Mode" By pressing the mode button you will see the that the 3 symbols next to the battery power symbol (Top left of the display) are highlighted by a box appearing around them when they are selected. Select the 'Flash Cord' mode e.g the one with the flash symbol and the letter C.
 
 3. "ISO" On the front of the meter is the ISO button, press this and hold it down whilst pressing the 'Up' and 'Down' arrows on the side of the meter. You'll see that the number next to the word ISO on the front right hand side of the display changes, this will need to be set so that it corresponds with your cameras ISO e.g. 100.
 
4. "Shutter Speed"; Using only the Up and Down buttons on the side of the meter watch the number next to the T symbol on the left hand side of the display. Adjust these numbers so that they are set to the same shutter speed as your camera e.g in this instance 125.
 
The meter is now calibrated and ready to go in conjunction with your camera being set up per the instructions above.
 
Once you've done this, arrange your lights in the manner you desire. Then using the flash meter, make an 'Incident' light-reading. (With white dome in place).
 
Plug the synch lead into the hotshoe adapter and the flash unit/head...
 
The Measurement of the light


The basic principle is - you measure the light that is falling onto the subject. This is the "primary" light source, you may introduce additional lights at different stages and the light readings will become more complex. So, in the first instance use one light and take a reading for that scenario.

Hold the light meter close to a key element of the subject. In the example above, it's a portrait, so the light reading is primarily for the face. Therefore hold the light meter almost touching the face (if not actually touching the face) and press the trigger button on the side of the meter at the top. This will trigger the flash and the light meter will register a light reading in the LCD panel next to the F (Largest number in the display). This will be the light reading measured in aperture values F2, F2.8, F4, F5.6, F8, F16 etc.

At this point you make a decision as to what aperture you want to use. Do you want limited minimal depth of field or maximum depth of field? Normally with a portrait, you want as much of the person in focus, so you would normally opt for an aperture of F8 or F11. These are also normally selected because your lens works best at these settings.

Get your assistant now to make the adjustments to the power output of the flash head, whilst you make the light readings.
 
 Using the dials on the side of the flash unit, your assistant makes adjustments either increasing or decreasing the power output. Each time they make an adjustment...
 
"Increase the power by 1 stop" They should dump the charge manually via the discharge button on the flash head before you make the next measurement. You make these adjustments until you get the required light output that you're after say for instance F11 (Which will be displayed as the F number on the LCD panel on the flash meter).
 
Warning - You have to ensure the reading is correct, the F number is recorded in whole values e.g f 8 and 1/10th values e.g. f 83. It is important that you are aware of these tenth values and that you adjust the lights accordingly and you're advised to work with whole values when you're learning the basics.
 
Don't stand in front of the light when you're measuring the light.
 
Once you adjusted the lights and they're giving you your reading of F8 and you've checked it, the model will have to stay in that light zone, if they move closer or further away the light reading will change because of Inverse Square Law. Keep control of your models make sure they stay on the same plane of focus, make a mark on the floor and ensure they stay in that zone. If they have to move around you will have to adjust the lights again.
 
Now set your camera to F8 and away you go!


Monday, 15 October 2012

Referencing guidance

www.listofphotographers.blogspot.com

Within your research work, you will need to reference your sources in a bibliography. There's loads of guidance out there which is fairly confusing and contradictory and some of your lecturers are going to get hot under the collar if you get it wrong. If you've got those kind of lecturers and perhaps you're on a degree you may want to ignore this blog and search elsewhere under the heading Harvard Referencing

But if you're on a level 3 course and just starting out we'll be more than happy if you do the following...

As you identify the websites, books and journals you're going to source you research from (Including images) you need to keep a list at the end of your blog entry that lists these. This is referred to as your Bibliography...


Websites (images) Have a brief description of the image and then the HTML link and the date that it was accessed. You could group all of the different types together...

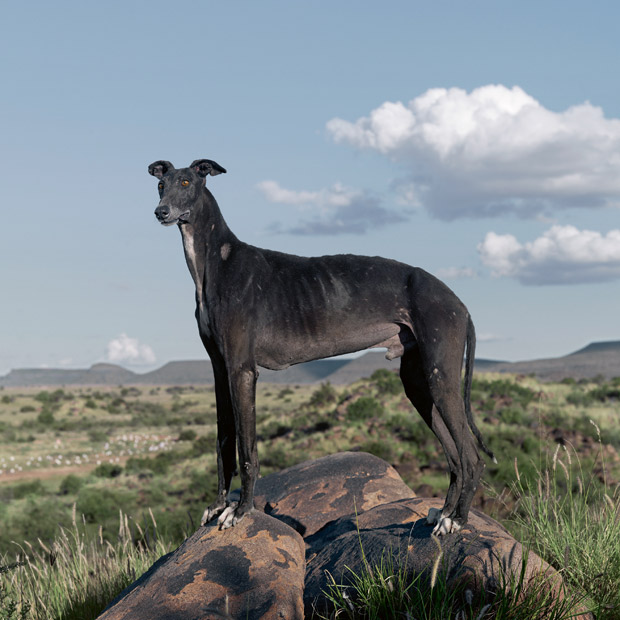
Image- Africanis Dog, Danielle Naude; http://static.guim.co.uk/sys-images/Arts/Arts_/Pictures/2013/7/31/1375271390007/Daniel-Naud--dog-photogra-008.jpg  26th Jan 2015.

Websites (Written material) Again state the Publisher and the theme, the HTML link and the date it was accessed as below in this example.


Text - The Guardian Danielle Naude article "Africanis". http://www.theguardian.com/artanddesign/2013/aug/01/daniel-naude-best-photograph-dog 26th Jan 2015

Books With this start with whether you've used the resource for text or image based reference material. Give a brief description of what was used, then follow with the Title, Author, date of the publication (On the inside page) and the place where the book was published and the publishing group. If you've copied images from the book state at the start whether you've used images or text.

Text - Article about The Bechers, (Page 402). Photography The Whole Story; Juliet Hacking & David Campany; 2012; London; Thames and Hudson.

Magazines/Journals With this start with whether you've used the resource for text or image based reference material. Give a brief description of what was used, then follow with the Title, Author, the page the image was copied from, the magazine title and issue number and date and where the magazine was published. If the magazine is published by a publishing group include that at the end.

Image -  Couple dancing, from series 'Poem' By Charlotte Tanguy (Page 26). British Journal of Photography, Issue 7824 (May 2014). London. BJP.

One of the secrets to blagging references at level 3 is to be consistent in the way that you do it, follow the same approach with every reference. Needless to say, if your lecturer suggests another way, go with their advice.

Quoting Text within your written material This is something we're always asking for and expect you to include in your work. It demonstrates that you're reading the research material and comprehending it and then using it in your written work to support your arguments and points of view. First some guidance about how to use quotes in your work...

  • The quotes should constitute no more than 10% of your written work.
  • They need to be clearly identified and obvious from the main body of text, much in the same way as this list of instructions is by use of indent.
  • Use inverted comma's to indicate the quote, use italics, separate the quote from the main paragraph.
  • Then follow it up with the reference using pretty much similar conventions as above...


In the image here we see that above (1) the text/writing is to the left and then the sentence leads us into the use of the quote. We identify that this is a quote at (2) by first indenting the text to the right slightly and with the additional use of the inverted commas. (3) The main body of the text is slightly smaller and again this is useful as it helps to show that this section is different e.g. a quote. Then finally the quote is referenced at (4). In this instance a website.

This same approach should be used in your blog or any written material. In a blog, especially if you're using Blogger you can create the indent with the use of a bullet point at the start.

Again I have to reiterate this may not be degree level referencing, but for level three this will suffice (Subject to the demands of your course specs and teachers).