http://www.listofphotographers.blogspot.co.uk/
Here's a short one
(Still working on this one)
Monday, 31 March 2014
Friday, 28 March 2014
Photography Lesson - 'Sea Change' Michael Marten
http://www.listofphotographers.blogspot.co.uk/
Photography Lesson - Tide in tide out a la' Michael Marten.
Resources - easy access to a water way that is affected by the tide
Analogue or digital cameras
Projection/Display methods
AG magazine Winter 2008 issue No.50
This is a series of lessons designed to be introduced and worked on over a series of sessions producing outcomes that identify multiple learning outcomes, meeting multiple assessment criteria.
Session 1: Research - Image Analysis and deconstruction.
In this session the students are introduced to the use of Hard-copy journals, in this instance AG magazine Winter 2008 issue No.50. Again, I would use this to reiterate the points made here in the introduction. The work that they'll be looking at, is the work of Michael Marten, if you conduct on-line research there seems to be very little in the way of research that you would be able to use in an academic scenario other than this link here... http://www.theguardian.com/books/2012/sep/23/sea-change-michael-marten-review Deemed suitable because it's a national newspaper and the article written by and or at least, edited by Sean O'Hagan. There is also this link here which again is a national newspaper but, if you check out the writers linkedin profile it's not of the same calibre as the Sean O'Hagan who is well respected critic and writer on the subject of photography. But the Daily Mail link does appear to have superior images which you might want to use within their work.
In the session, I would present at least two of the articles from the above - certainly the one that has come from the hard-copy source (AG Magazine) and distribute these in class.
The Task would be for the students to look at the images and read through the articles and start to make sense of the work. They would be expected to record what is in the images and then start to analyse the images and the article in more depth, deconstructing the images and making observations with regards to how visual language is used within the images. By the end of the session the students should have written the basics of a research piece, using quotes from the articles that establish what the images are about and who the target audience might be. Look here for the prompts that can be used in the deconstruction/analysis of the text and images.
The Students in their *own time should then go on to search out a selection of Martens images and add them to the written material. It may also be a good idea to supply at least one example within the lesson if your resources allow for it just to get the project under-way.
*This may be possible in lesson if your college/school/university has ready access to PC's or Mac's linked to colour printers.
My own approach -
I would have pre-printed high quality laminated images printed to A3 size in class. I would issue these to the students and break them up into small groups of 3 or 4. I would set each group a separate task relating to making sense of the images...
Group 1 - Looks at... Image aspects; colour; light; composition;
Group 2 - Looks at... Content, subject, meaning, metaphors, what is the work about?
Group 3 - Looks at... Equipment, format, camera, quality
Group 4 - Looks at... Target audience, usage
Group 5 - Looks at... What can be taken from the work to use in your work
Group 6 - Looks at... Genre, influenced by, in the tradition of
They would have 20 minutes to discuss the images and write on a large piece of paper their findings and one of the group would be designated the role of presenting their findings to the rest of their class. Others within the group would be given roles such as scribe and time - keeper.
As the presentations are made I and the students would make notes about what points are being picked up on and observed. I would transfer my notes to a white board.
The students would then take that shared info and then use the image analysis/deconstruction prompts here to write up their response and that would be the basis of their research.
I would then encourage them to improve or bolster the work further in their own time adding images and maybe look at similar work (Eye on the Thames by Jonathan Bayer) or Jason Orton's work and compare.
Session 2 -
The follow-up session would be to reflect on the session above and the work done since. They would reflect on the useful-ness of the different methods of research, primarily looking at whether they thought the Hard-Copy resources were superior to the internet information?
The students would reflect on the work using the Gibbs Reflective Practice model looking to write somewhere between 300 - 450 words. At the end of the cycle there is the 'Action Plan' section. Use this to write up and discuss how they will approach the practical aspect which would be in the next session.
I allow 10 minutes for each of the sections within the Gibbs cycle approximately, but I would extend the 'Action Plan' section and discuss this as a group, writing up on the white board what it is they feel they need to consider when shooting the images in the next session. We would discuss how their cameras need to be set up, light in consideration with the possible light scenarios and white balance, files sizes and type, field of view and lens focal lengths, shutter speeds, ISO, metering issues etc.
Session 3 - Briefing and Shoot
For us, the location is only 10 minutes away, so we meet, quickly assess the light discuss the impact of the light and then we'll walk down to the beach targeting 4 points primarily. Each view will be slightly different and we're likely to focus on having jetties in the foreground of the images. Each student will shoot a minimum of 4 scenes, making notes of where the shots were taken and the focal lengths used. Additional notes will be made as to helping re-establish the compositions on the 2nd visit.
Post session 3 -
In their own time students will print off contact sheets and produce at least 4 images or more. Additional annotations might be made and the images will be presented in their folders ready for the next session.
Session 4 - Reflection using the Gibbs method
By now this is coming together as a mini-project with many of the components that the students will be assessed against. The final touch would be in session 4 where the students would be required to reflect on the recent activities and learning using the Gibbs reflective practice method again.

I generally do this over a period of an hour or so, setting 10 minutes to respond to each of the prompts using a clock. Some of the prompts over-lap when they write it up and some demand more writing than others, so having done this a few times they adapt to the hour long period and spend longer on some sections knowing that they can make up the time elsewhere.
Session 5 - Second shoot (Tide in opposite state)
Again in their own time the images would be printed and presented in their workbooks along with contact sheets and annotations if deemed necessary.
Session 6 - Final Gibbs reflection
The final Gibbs reflection would be in more depth looking at what they have learned from the experience, has it given them ideas, do they agree with Marten's own rationale for his images, where might they take this basic idea and develop it further. More discussion could happen around the rationale for Martens images?
Photography Lesson - Tide in tide out a la' Michael Marten.
Resources - easy access to a water way that is affected by the tide
Analogue or digital cameras
Projection/Display methods
AG magazine Winter 2008 issue No.50
This is a series of lessons designed to be introduced and worked on over a series of sessions producing outcomes that identify multiple learning outcomes, meeting multiple assessment criteria.
Session 1: Research - Image Analysis and deconstruction.
In this session the students are introduced to the use of Hard-copy journals, in this instance AG magazine Winter 2008 issue No.50. Again, I would use this to reiterate the points made here in the introduction. The work that they'll be looking at, is the work of Michael Marten, if you conduct on-line research there seems to be very little in the way of research that you would be able to use in an academic scenario other than this link here... http://www.theguardian.com/books/2012/sep/23/sea-change-michael-marten-review Deemed suitable because it's a national newspaper and the article written by and or at least, edited by Sean O'Hagan. There is also this link here which again is a national newspaper but, if you check out the writers linkedin profile it's not of the same calibre as the Sean O'Hagan who is well respected critic and writer on the subject of photography. But the Daily Mail link does appear to have superior images which you might want to use within their work.
In the session, I would present at least two of the articles from the above - certainly the one that has come from the hard-copy source (AG Magazine) and distribute these in class.
The Task would be for the students to look at the images and read through the articles and start to make sense of the work. They would be expected to record what is in the images and then start to analyse the images and the article in more depth, deconstructing the images and making observations with regards to how visual language is used within the images. By the end of the session the students should have written the basics of a research piece, using quotes from the articles that establish what the images are about and who the target audience might be. Look here for the prompts that can be used in the deconstruction/analysis of the text and images.
The Students in their *own time should then go on to search out a selection of Martens images and add them to the written material. It may also be a good idea to supply at least one example within the lesson if your resources allow for it just to get the project under-way.
*This may be possible in lesson if your college/school/university has ready access to PC's or Mac's linked to colour printers.
My own approach -
I would have pre-printed high quality laminated images printed to A3 size in class. I would issue these to the students and break them up into small groups of 3 or 4. I would set each group a separate task relating to making sense of the images...
Group 1 - Looks at... Image aspects; colour; light; composition;
Group 2 - Looks at... Content, subject, meaning, metaphors, what is the work about?
Group 3 - Looks at... Equipment, format, camera, quality
Group 4 - Looks at... Target audience, usage
Group 5 - Looks at... What can be taken from the work to use in your work
Group 6 - Looks at... Genre, influenced by, in the tradition of
They would have 20 minutes to discuss the images and write on a large piece of paper their findings and one of the group would be designated the role of presenting their findings to the rest of their class. Others within the group would be given roles such as scribe and time - keeper.
As the presentations are made I and the students would make notes about what points are being picked up on and observed. I would transfer my notes to a white board.
The students would then take that shared info and then use the image analysis/deconstruction prompts here to write up their response and that would be the basis of their research.
I would then encourage them to improve or bolster the work further in their own time adding images and maybe look at similar work (Eye on the Thames by Jonathan Bayer) or Jason Orton's work and compare.
Session 2 -
- Reflect on the research and image analysis
- Plan the shoot
The follow-up session would be to reflect on the session above and the work done since. They would reflect on the useful-ness of the different methods of research, primarily looking at whether they thought the Hard-Copy resources were superior to the internet information?
The students would reflect on the work using the Gibbs Reflective Practice model looking to write somewhere between 300 - 450 words. At the end of the cycle there is the 'Action Plan' section. Use this to write up and discuss how they will approach the practical aspect which would be in the next session.
I allow 10 minutes for each of the sections within the Gibbs cycle approximately, but I would extend the 'Action Plan' section and discuss this as a group, writing up on the white board what it is they feel they need to consider when shooting the images in the next session. We would discuss how their cameras need to be set up, light in consideration with the possible light scenarios and white balance, files sizes and type, field of view and lens focal lengths, shutter speeds, ISO, metering issues etc.
Session 3 - Briefing and Shoot
For us, the location is only 10 minutes away, so we meet, quickly assess the light discuss the impact of the light and then we'll walk down to the beach targeting 4 points primarily. Each view will be slightly different and we're likely to focus on having jetties in the foreground of the images. Each student will shoot a minimum of 4 scenes, making notes of where the shots were taken and the focal lengths used. Additional notes will be made as to helping re-establish the compositions on the 2nd visit.
Post session 3 -
In their own time students will print off contact sheets and produce at least 4 images or more. Additional annotations might be made and the images will be presented in their folders ready for the next session.
Session 4 - Reflection using the Gibbs method
By now this is coming together as a mini-project with many of the components that the students will be assessed against. The final touch would be in session 4 where the students would be required to reflect on the recent activities and learning using the Gibbs reflective practice method again.
I generally do this over a period of an hour or so, setting 10 minutes to respond to each of the prompts using a clock. Some of the prompts over-lap when they write it up and some demand more writing than others, so having done this a few times they adapt to the hour long period and spend longer on some sections knowing that they can make up the time elsewhere.
Session 5 - Second shoot (Tide in opposite state)
Again in their own time the images would be printed and presented in their workbooks along with contact sheets and annotations if deemed necessary.
Session 6 - Final Gibbs reflection
The final Gibbs reflection would be in more depth looking at what they have learned from the experience, has it given them ideas, do they agree with Marten's own rationale for his images, where might they take this basic idea and develop it further. More discussion could happen around the rationale for Martens images?
Tuesday, 4 March 2014
Mixed Media - digital + Charcoal, chalk and scratching.
http://www.listofphotographers.blogspot.co.uk/
Incomplete more to follow.
But briefly - Get a digital image, get it printed onto card, cartridge paper or some other type of art paper. If you're really desperate bog standard paper.
Then play around with it, making it look darker and moodier, scratch the surface, smudge it - just work with it and see what you come up with. Use chalk, conte pencils, charcoal and coloured chalk and it'll start to come together and become something very different.
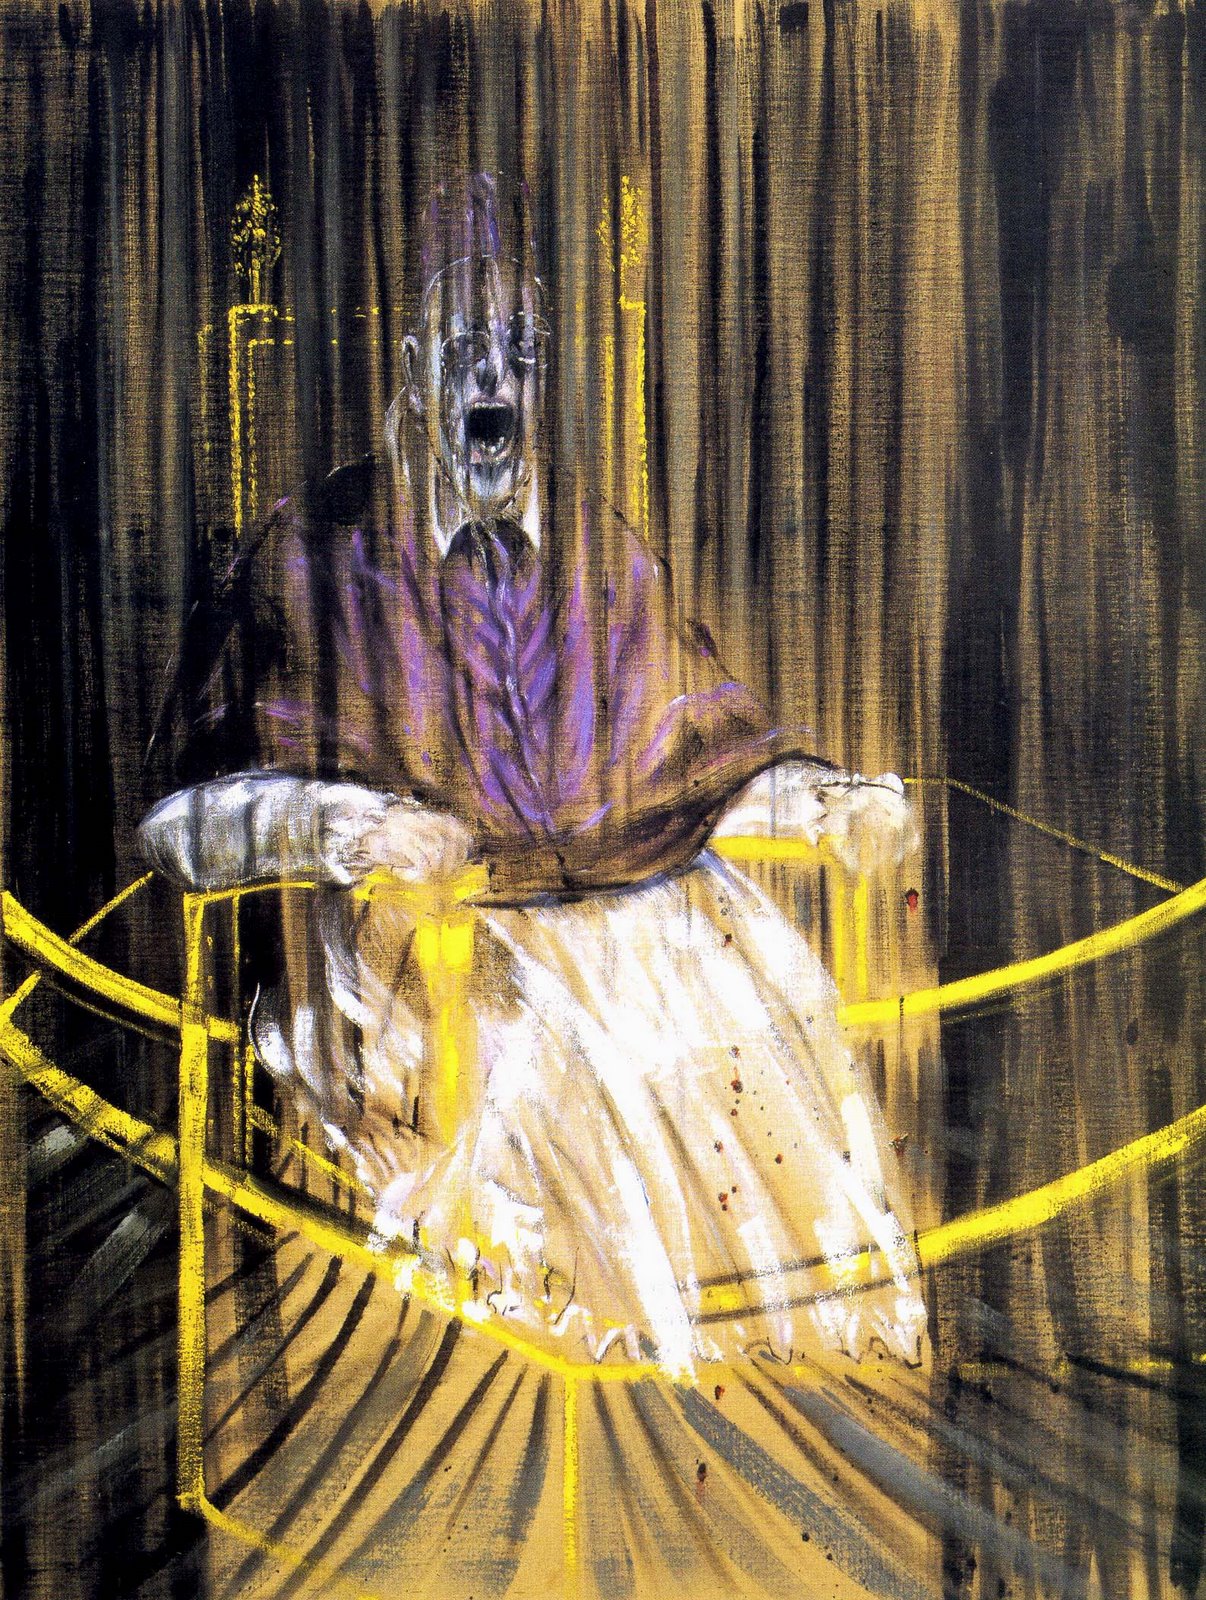
http://www.arbreriefantasy.com/IlluImgStock/87/ShyChristopher_csdi14.jpg
http://upload.wikimedia.org/wikipedia/en/archive/f/f4/20100830193250!The_Scream.jpg
http://markmcleod.org/wp_clevelandstateart/wp-content/uploads/2014/02/screaming-pope.jpg
This also offers and opportunity to bolster most aspects of your work - you could work with the technique as a mini - project...
Look at the example here (Image to come) and read the blog content here and write a quick proposal saying what you intend to do. Then write a short plan - times, dates, schedule materials etc.
The research the artists above and identify what 'Expressionism is'. Write up a definition and then commit to producing an image that has elements of expressionism within it using this mixed media technique.
Once you've done the research and the plan/idea becomes more coherent - produce a Gibbs reflection and the start making pictures.
Record what you do, keep all the experimental versions of the work you make and refine the work - coming up with an approach that suits your work. If you work at it with different images you may find that you come up with something that works exceptionally well. It may mean you have to do a re-shoot?
Once you've produced some images - then do another Gibbs reflection and say whether it works as a final idea for your poject. Even if you reject it, you would have still produced some images that will be good for your workbook/portfolio that shows you've explore photography and art further.
Incomplete more to follow.
But briefly - Get a digital image, get it printed onto card, cartridge paper or some other type of art paper. If you're really desperate bog standard paper.
Then play around with it, making it look darker and moodier, scratch the surface, smudge it - just work with it and see what you come up with. Use chalk, conte pencils, charcoal and coloured chalk and it'll start to come together and become something very different.
http://www.arbreriefantasy.com/IlluImgStock/87/ShyChristopher_csdi14.jpg
http://upload.wikimedia.org/wikipedia/en/archive/f/f4/20100830193250!The_Scream.jpg
http://markmcleod.org/wp_clevelandstateart/wp-content/uploads/2014/02/screaming-pope.jpg
This also offers and opportunity to bolster most aspects of your work - you could work with the technique as a mini - project...
Look at the example here (Image to come) and read the blog content here and write a quick proposal saying what you intend to do. Then write a short plan - times, dates, schedule materials etc.
The research the artists above and identify what 'Expressionism is'. Write up a definition and then commit to producing an image that has elements of expressionism within it using this mixed media technique.
Once you've done the research and the plan/idea becomes more coherent - produce a Gibbs reflection and the start making pictures.
Record what you do, keep all the experimental versions of the work you make and refine the work - coming up with an approach that suits your work. If you work at it with different images you may find that you come up with something that works exceptionally well. It may mean you have to do a re-shoot?
Once you've produced some images - then do another Gibbs reflection and say whether it works as a final idea for your poject. Even if you reject it, you would have still produced some images that will be good for your workbook/portfolio that shows you've explore photography and art further.
Thursday, 6 February 2014
Location lighting - Rooms - single light diffuse
http://www.listofphotographers.blogspot.co.uk/
This is a suggestion for a test shoot you should explore and try out in situ.
The scenario - You want to shoot someone in their house, it could be a bedroom or similar? Beforehand you should record how you might go about it and what approach you're going to use and identify how the images might be used and therefore identify the quality aspects of the images and how you might attain those qualities. You might want to consider the lighting and the implications of the mood that might inherent in the space and the impact this has on the image? Perhaps look at the link above or look at other approaches via the photographers in this link here and consider what it is they're trying to achieve with their lighting and whether it matches your intentions?
Or you could simply following the instructions here and just try this out as a test shoot?
This approach uses and exceptionally simple 'Flat' light with very little contrast, the results should be virtually shadowless and diffuse with a very even light effect. My wife learned this or a very similar approach when assisting Bill Morton in the 1990's.
The version I'm using here would suit a medium sized room, but could be readily adapted in a variety of ways. The basic principles employ the use of inverse square law to spread the light as much as possible in order to gain a high degree of control over the light.
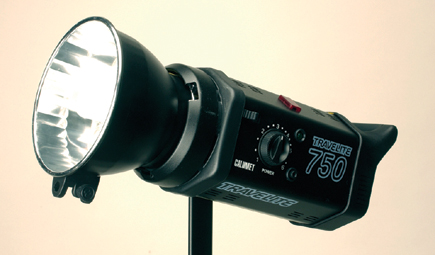
The subject and the key features in the image need to be pretty much on the same plane of focus, to make this easy. The subject in the diagram is placed on one side of the room with the objects around them potentially being integral to the image as in a bedroom scenario. The light which is singular needs to be relatively powerful and is fitted with a dish or a small soft box ensuring that the light is directed towards the corner of the room (Ceiling and wall corner).
The light needs to be as far away as practicable from the ceiling/wall corner to facilitate the inverse square law benefits. The further away the light is from the corner, the bigger the reflected light source becomes and the more even the light quality. Needless to say this is modifiable and can be increased/decreased in order to affect the qualities of the shadow.
Floor plan to follow....
* Once you've got this far and tried the technique out, you can look to make it far more subtle and perhaps look at using the same system and approach but look to use the flash as a secondary source. The ambient light in the room in this scenario could be used as the primary light source, with this set-up used as a fill-in. You would probably need to somehow massively reduce the light output or use a good flash-gun instead. This way the mood of the room as seen with the eye would be recorded if worked on carefully.
This is a suggestion for a test shoot you should explore and try out in situ.
The scenario - You want to shoot someone in their house, it could be a bedroom or similar? Beforehand you should record how you might go about it and what approach you're going to use and identify how the images might be used and therefore identify the quality aspects of the images and how you might attain those qualities. You might want to consider the lighting and the implications of the mood that might inherent in the space and the impact this has on the image? Perhaps look at the link above or look at other approaches via the photographers in this link here and consider what it is they're trying to achieve with their lighting and whether it matches your intentions?
Or you could simply following the instructions here and just try this out as a test shoot?
This approach uses and exceptionally simple 'Flat' light with very little contrast, the results should be virtually shadowless and diffuse with a very even light effect. My wife learned this or a very similar approach when assisting Bill Morton in the 1990's.
The version I'm using here would suit a medium sized room, but could be readily adapted in a variety of ways. The basic principles employ the use of inverse square law to spread the light as much as possible in order to gain a high degree of control over the light.
The subject and the key features in the image need to be pretty much on the same plane of focus, to make this easy. The subject in the diagram is placed on one side of the room with the objects around them potentially being integral to the image as in a bedroom scenario. The light which is singular needs to be relatively powerful and is fitted with a dish or a small soft box ensuring that the light is directed towards the corner of the room (Ceiling and wall corner).
The light needs to be as far away as practicable from the ceiling/wall corner to facilitate the inverse square law benefits. The further away the light is from the corner, the bigger the reflected light source becomes and the more even the light quality. Needless to say this is modifiable and can be increased/decreased in order to affect the qualities of the shadow.
Floor plan to follow....
* Once you've got this far and tried the technique out, you can look to make it far more subtle and perhaps look at using the same system and approach but look to use the flash as a secondary source. The ambient light in the room in this scenario could be used as the primary light source, with this set-up used as a fill-in. You would probably need to somehow massively reduce the light output or use a good flash-gun instead. This way the mood of the room as seen with the eye would be recorded if worked on carefully.
Friday, 31 January 2014
Poly-board Tunnel - Fashion Portraits - Diffuse Light
http://www.listofphotographers.blogspot.co.uk/
This is another light set-up that we cover, that produces an exceptionally soft diffuse wrap-around light. It requires a fairly large studio space because you need to make a large box shape construction out of your 8'x4' poly-boards. You'll need the following equipment...
2 x studio flash heads and appropriate light stands.
6 x Poly-boards 8'x4'.
A table (typical school table).
Optional backgrounds.
2 x small light stands.
Place the table in the middle of the studio space with an appropriate (white) background behind where the subject/model is stood (A). Construct the square shaped tunnel on top of the table (See second diagram). The sides need to be supported by small extended light stands either side of the poly-boards as you construct it, you should also work with an assistant to make the whole thing easier and safer. Once the side are in place the top of the box should be carefully placed making a tunnel.
Starting with one light, either (E) or (D) set the light up so that it's just outside of the box positioned so that it's directing the light into the box at 45 degrees. Have the light so that it's positioned mid-way up the box, with the light angled into the box straight rather than downwards or upwards. The lights must not be visible to the model when standing at (A). You take your light reading from the face of the model pointing the invercone into the tunnel measuring the light falling onto the face of the model. Dependent on what you're aiming to achieve (Shallow depth of field or deep) make a choice with regards to your aperture. We would generally go for f8 for each flash head. They're measured individually and accurately (work to eliminate the 10ths of stops). Once they're both set to f8, the combined reading of both of them being fired at the same time will produce a reading of f11. At which point if your camera is set up correctly you're good to go!
This below is an approximation of a 3D view.
If you've not set the lights up with the poly-boards at (c) you'll probably experience bright panels of light either side of the subject in your images. The light travelling down the tunnels will be absorbed to some extent giving you an image in accordance with your meter reading, but the light that passes down the outside of the tunnel is not hindered and may be recorded in the image either side of your model slightly brighter. In which case you need to prevent that light from falling on your background.
The effect is that a white background as with our infinity cover will be rendered slightly U/Exp. The further the box is from the cover the darker it will be.
3 Light system - pure white back-ground.
We then developed the set-up, by introducing a 3rd light (below) indicated by (j) in this instance we just used a dish-less head. The light was positioned so that the light fell onto the white B/G, but you have to be careful to ensure none of the light encroaches onto the model/subject to ensure the hatched area (b) is still maintained at around f11. The third light (g) is calibrated so that it gives a reading of around f16 (1 stop brighter). This modification of the lighting will produce a pure white background.
This method was demonstrated originally by commercial photographer Struan Wallace.
Thursday, 30 January 2014
Studio lighting Film Noir Gloom
http://www.listofphotographers.blogspot.co.uk/
This is the last of the lighting sessions where we've been exploring lighting with a Film Noir/Horror theme. Again using chiaruscoro techniques (Single point light) allowing for much of the scene to fall into darkness increasing the sense of gloom. As before, the influence comes from film stills - Nosferatu the vampire (The stair case shadow scene). One of the scenes from the film Noir Classic 'Double Indemnity' and the more recent take on film Noir - 'Sin City'.

.jpg)
.jpg)

This is the last of the lighting sessions where we've been exploring lighting with a Film Noir/Horror theme. Again using chiaruscoro techniques (Single point light) allowing for much of the scene to fall into darkness increasing the sense of gloom. As before, the influence comes from film stills - Nosferatu the vampire (The stair case shadow scene). One of the scenes from the film Noir Classic 'Double Indemnity' and the more recent take on film Noir - 'Sin City'.
The classic 'Staircase' scene from the 1922 German Expressionist film Nosferatu
A scene from the Film Noir classic "Double Indemnity" 1944
A scene from the Film Noir inspired Sin City 2005
Diary style work approach
Diary Style work approach Updated Jan 2015
Increasingly we're advising students to work with both a hardcopy display folder (Below) and a 'Blogger' blog.

The majority of your written work will be typed up within your blog and 'Published' daily in a reflective diary style. So each day your in college or whenever you produce some practical work you would write up an entry using the Gibbs method reflecting on your days activities.
How do I lay out and title my blog?
Look here for the instructions as to how you start a blog for your course at Southend.
What do I put in the blog?
As much as you can is the short answer. The way that you're expected to work is to have your research completed in the first two weeks. Your research should be written up straight into the blog using this approach here. Add images as much as you can and make the blog visual. Once the research is completed the rest of the blog for each unit is to be written up in the blog 'Reflectively' using the Gibbs reflective practice method. This should be done on a regular basis. On the days you're in college, it should be done daily, primarily while you're in college. Outside of college hours, you should do it as soon as you can if you shoot or are producing work of some form connected with your course.
Always use the 6 Gibbs prompts to structure the way you write up your reflections. It will make it easier to assess, you'll probably be more aware that you're meeting the assessment criteria and you'll soon realise and learn that it's an affective way to record your work in order that you meet the criteria.
What do I use the folder for?
The folder is used for a number of things, but primarily for the display of your final images. At the end of each of your projects you should aim to produce high quality final portfolio standard images. These should either be mounted on A3 card/paper or produced A3 in size. You should aim to keep the sizes fairly uniform, so in the case of Black and White darkroom prints I advise that you print all of your images 'Full Frame' which is approx. 9" x 6.5" (24cm x 16cm). Similarly with enlarged sections of negatives blow those up to the same size.
*Note; If you intend to mount prints on to card or paper in your folder, don't use glue or stick them down in any way that is permanent. Instead use masking tape or sellotape and form it into a circle and use a small piece to hold the print in the centre of the card. Inside the sleeve, the print will need little support to hold it in place. This will allow you to use the prints in another folio if you decide to 'Upgrade' your portfolio prior to seeking employment or Uni places.
On-Going hard-copy work
The other things you'll put in the folder will include...
Increasingly we're advising students to work with both a hardcopy display folder (Below) and a 'Blogger' blog.
The majority of your written work will be typed up within your blog and 'Published' daily in a reflective diary style. So each day your in college or whenever you produce some practical work you would write up an entry using the Gibbs method reflecting on your days activities.
How do I lay out and title my blog?
Look here for the instructions as to how you start a blog for your course at Southend.
What do I put in the blog?
As much as you can is the short answer. The way that you're expected to work is to have your research completed in the first two weeks. Your research should be written up straight into the blog using this approach here. Add images as much as you can and make the blog visual. Once the research is completed the rest of the blog for each unit is to be written up in the blog 'Reflectively' using the Gibbs reflective practice method. This should be done on a regular basis. On the days you're in college, it should be done daily, primarily while you're in college. Outside of college hours, you should do it as soon as you can if you shoot or are producing work of some form connected with your course.
Always use the 6 Gibbs prompts to structure the way you write up your reflections. It will make it easier to assess, you'll probably be more aware that you're meeting the assessment criteria and you'll soon realise and learn that it's an affective way to record your work in order that you meet the criteria.
What do I use the folder for?
The folder is used for a number of things, but primarily for the display of your final images. At the end of each of your projects you should aim to produce high quality final portfolio standard images. These should either be mounted on A3 card/paper or produced A3 in size. You should aim to keep the sizes fairly uniform, so in the case of Black and White darkroom prints I advise that you print all of your images 'Full Frame' which is approx. 9" x 6.5" (24cm x 16cm). Similarly with enlarged sections of negatives blow those up to the same size.
*Note; If you intend to mount prints on to card or paper in your folder, don't use glue or stick them down in any way that is permanent. Instead use masking tape or sellotape and form it into a circle and use a small piece to hold the print in the centre of the card. Inside the sleeve, the print will need little support to hold it in place. This will allow you to use the prints in another folio if you decide to 'Upgrade' your portfolio prior to seeking employment or Uni places.
On-Going hard-copy work
The other things you'll put in the folder will include...
- Black and white prints (tests)
- Black and white exercise prints and trials
- Contact sheets
- Test strips
- Final B&W images (Mounted on A3 card/paper see above).
- Hard-copy print offs of your research internet (Photocopies of journal research)
Subscribe to:
Posts (Atom)