Every single project you produce must be under-pinned by research. No photography is original, so whatever the idea you come up with, someone will have already done something like it before. As students studying photography it's important that you acknowledge this fact and therefore reference the work that preceded your work and acknowledge that connection. The easiest way to do this, is to accept that fact and base all of your work around your research - making your research your starting point. Otherwise, you'll produce the work and then have to go looking for something that's connected to your work and that's a poor way of working, lecturers will generally be able to see that's how you've produced your work and you'll run the risk of attaining a low grade.
This is how we recommend you go about your research in order that you attain the high grades...
No.1
Research regularly - learn about photography and photographers. Set aside a couple of hours or more where you use the books and journals. Use your time at college as much as possible to do to your research - between lesson, before and after scheduled classes.
No.2
Use books and journals - Do not use the internet as your starting point if possible. You will be strongly advised to buy a number of books to support your course work
The more you look at photography and read about it, the more you'll learn and understand it. Be very particular about your resources e.g. the material that you use for your research and the way that you conduct your research. We recommend a selection of books and journals that you should make your key resources for your research.
At the end of each year, you have to produce a 'Final Major Project' (FMP). The projects rely on you having good quality research. The research that you do is fundamentally important to all aspects of this course, but especially so when it comes to the two final major projects. The more research you do and the greater diversity of your research the more readily you'll be able to work with and understand what makes photography work , how & why it's produced and how it communicates to its audience.
At the start of the course you'll be shown how to conduct your research and what to use for your research. If you follow these instructions and do as suggested here, you're going to set yourself up to do really well...
One of the first things you'll be shown and introduced to is the LRC (Learning Resources Centre) on the first floor...


Here they are - the coveted BJP's (British Journal of Photography). There's about 45-50 copies, every week you need to grab a few copies and have look through them make notes, read the articles and immerse yourself in the photography that you'll find in the magazines. You must pick one article from one of these magazines every week.

1. A desire to learn about photography and accept that it is something very different to what you've previously perceived.
2. An open mind.
3. The ability to read, make notes and learn.
4. Credits on your photo-copier card (ID card).
5. Access to a photo-copier machine and the ability to figure out how to make colour photo-copies.
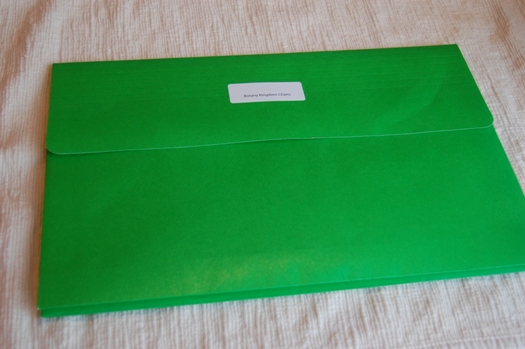
6. A folder for your hard-copy research material.

A photo-copier.

A folder to store your 'Hard-copy' research material.
Every week you will now have to go to either the LRC or The Forum (Library) and use either a Journal or a book to identify at least one photographer, ideally you'll use one of the Journals. You will need to do the following...
1. Photo-copy the page you find the photographer/images from.
2. Make a record of the page number, magazine title, number and date.
3. Photo-copy the pages with the images and the article that accompanies the photographers name/images.
4. Each week on your blog you will have to add the 'Bibliography' details to your 'Blog Bibliography' and paste the same details into your Research post for that week.
5. You must keep the photo-copies in a separate research folder.
6. Now armed with the name of the photographer and the name for the 'Body of work' you need to go on-line and find additional research material for your photographer that you've identified from the Journals.
7. When researching on-line you need to use the correct pre-fixes and use national and international publications, galleries and established websites with professional writers and critics.
8. Again, save the web-links and add to your bibliography.
9. Print off the web pages and add to your research folder.
10. Read through the articles and answer in detail...
- What is the concept/idea behind the photography - what is it about?
- What or who is it inspired by?
- What equipment was used?
Research is absolutely essential and under-pins this course wholly. Without good quality research you're going to struggle to pass this course. Remember essentially you're studying photography first and foremost and learning how to use your cameras as you produce the work through a process of trial and error.
Essential to doing well on this course are a number of books...
Photography The Whole Story - Juliet Hacking and David Campany.
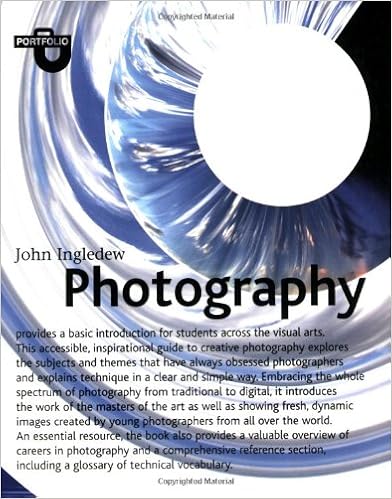
Portfolio (Photography) - John Ingledew
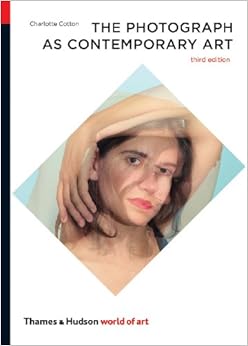
The Photograph as contemporary Art - Charlotte Cotton.
Experimental Photography (A handbook of techniques) - Marco Antonini.
Langfords Basic Photography - Michael Langford.
You should own these and use these throughout the 2 years you are studying. These books along with 'Journals' are the key to attaining the higher grades and passing the course with ease.
Then go to Blogger and sign up and get yourself Blogging - see the instructions here
On-line learning.
1. Start researching now even if that's in Sept - the first week of your second year.Why?
2. You've completed the first year - what kind of photography do you prefer - people, places or objects - when you research look for that kind of photography - keep the theme broad initially. Why?
3. Use high quality 'Hard-copy' research materials - The BJP, Hotshoe and similar journals or books such as these...Why?


4. Do it like this (The Process)...
Step 1. Look through these magazines and books frequently - the more you use these types of resources the quicker you're going to learn and the better quality your learning will be Why?
Step 2. At least once a week choose a photographer/set of images that is associated with your theme/subject Why?
Step 3. Record the title of the book magazine, the writers name, publishing company, date of publication where for your bibliography - do this as you go along. Start a word file or write it down do not forget it or leave it till later Why?
Step 4. Photo-copy or scan the images and the article in colour.Why?
Step 5. Without reading the article - write up your initial response to the images using the standard prompt sheet. Head this section My Initial response answer as many of the questions in as much depth as possible.
Step 6. Read the article and then summarise what it is that you have learned about the photographer and the photography. You need to focus on a number of key points...
a. What is the concept behind the images - what are they about and why have they been produced, what is it the photographer is trying to suggest or say through the use of these images - what is the message/meaning? Is it obvious or is it ambiguous - how and why?
b. How is visual language used in the images? Does reading the article firm up your understanding and analysis produced at step 5? Discuss, mood, composition, colour, light, body language, shape, form, facial expressions etc.
c. Who or what are the images inspired by - print off such images if discussed by the photographer and comment on the connections between the two.
d. Does the article discuss materials, techniques, processes and equipment - if so what was used, how and why?
e. What key points do you like - what is it that you could borrow and use in your photography, does it help you understand the concept and idea for your own work?
Step 7. Using the name of the photographer and the body of work - look it up on the internet - add further images and look for more research material - especially interviews or articles written by experts, critics, reviewers from national newspapers and galleries. Keep the links and add to your bibliography. Print off the articles and images.
Step 8. Get all of this work stapled and kept together.
Step 9. Put the copied images and the article in a 'Research Folder' write down the book/magazine you got them from on the photo-copies so you can cross reference with the bibliography later on.
Step 10. Repeat the process once a week. Why?
No comments:
Post a Comment