Sunday 15 November 2015

How to use your research material and write up a response to it.

When you read a Journal/book as part of your research what is it that you should be looking for?

1. The name of a photographer that produces images that interest you for some reason or is directly linked to the theme you're working with or, uses Materials, techniques, processes and equipment in a way that you're interested in.

2. Once you've found something that is interesting (Images) you then have to find out the following by researching...

Watching videos or reading articles.

From this process you need to be looking for information about...

  1. Why the images were made 'The basic theme'?
  2. How is visual language used - construction of the image?
  3. How colour is used?
  4. How they're composed?
  5. How the light is used?
  6. What Materials, techniques, processes & equipment were used?
  7. What are the pictures for - where might they appear, how will they be used and what context have they been produced for?
  8. What or who are they influenced by?
  9. What do they mean - what is it about?
For instance... reading the BJP you might have stumbled upon this article and it may have caught your eye for a number of reasons...

So for instance 1. Basic theme. If we read the first paragraph this information is there... (Under-lined in red here below).

You can't simply copy this as that would be plagiarism, what you have to do is re-write it in your own words, you can reduce the amount of writing or you can add to it, that's up to you. For instance...

Once I’d read the article it became apparent that the images are of small birds that were placed in a pond in his garden. Sira was looking for a ‘personal project’ to work on to develop his photography. He started to shoot the images systematically over a long period of time at different times of the day over periods as long as 10 months.

2. How is visual language used - construction of the image? For this section you have to have read all of the article. You would have also had a go at this in the initial response part of the research process where you'd written about your own understanding of the image - deconstructing it and analysing it before reading about it see here. If you read the whole article the visual language aspect is alluded to towards the end of the interview here...


Again - don't copy this, convert into your own language..

He photographed the birds from above ensuring that they looked small in comparison with the space around them…
 
“I photographed the majority of the birds from above and tried to make the objects appear small in wide surroundings”. Einar Sira; BJP, Issue 2546, Nov 2011, page 65.

 He says that he’s tried to capture the beauty of the subjects and the process of decay in the images. Looking at the images as a collection, there’s definitely to some extent a feeling of continuity and cohesion, the images work as a set, the colours are all very similar as are the compositions and the size of the birds in the frame.

When you use quotes make sure that you highlight the fact that you're quoting. Indent the text and put it in inverted commas and perhaps even use a different colour pen. Also reference the quote (Small text).

3. How is colour used? You would have answered this at the earlier stage when analysing one of the images as a part of your initial response to the images. If you read through the text there is no reference to the use of colour, neither the photographer or the interviewer Gemma Padley make reference to it, but when looking at a the images as a collective as opposed to a single image you might want to add more.


In my initial response I wrote about the fact that the images were dark, cold and blue. With the theme appearing to be something along the line of death, this cold and dark approach potentially suits the theme. Now we see that all of the images are of the same palette and that they harmonise, this helps with the theme and this reinforced by the fact that theme is consistent – small birds decaying. The photographer discusses the light and it appears that he uses daylight predominantly…

 
We can also see in one of the images the reflection of the sky with blue areas and white clouds (Bottom right images). This use of daylight seems to be planned (cold blue light) and the use of the sliver reflector ensures that the colour of the light reflected back into the subject is neutral.


4. How are the images composed
Composition and the way that the subjects are arranged are mentioned in some detail, but it required further research beyond the obvious. A camera is mentioned and it would be useful from a students point of view to look at this camera and understand how it use might affect the image. A search on Google images gives you some indication of what the camera is like and if you were to combine the use of the Google search and then explore the camera in more depth you'll start to understand why the images are square.

The text in the BJP article along with the mention of the camera also features these points...

Your response then might be along the lines of...


A search on Google images using the mention of the camera (Hasselblad HD4 – 50) allows us to see the equipment that Sira has used for this work. Asking the lecturers and seeing the images that accompany the images of the camera on Google, it seems that this camera captures square images and therefore explains the format of the images. This square format allows Sinar to balance the subject in the centre with equal amounts of space around it. He also talks about the separation of the birds from the background, saying in some instances the birds were laid on top of glass above the water and this explains the odd looking image top right. Similarly the bird bottom right appears to have been composed in the same way. All of the images were shot from above, which seems obvious if they’re laid in water, but I guess they may have been composited together digitally, but instead as indicated earlier these were all shot in situ in his garden.


5 How the light is used?
As it should be, there's lots of references to the light for you to refer to and learn from in the article. Any mention of light in such articles is valuable as light is the very essence of photography, so if it is mentioned use it in your research. Write about it in your own terms and see if what you wrote about in your initial response is correct.


With regards the light Sira discusses it in some depth. The project has been shot over a long period of time and he says that the light in Norway is inconsistent and he’s used it in many wqys. He also says that he’s used artificial lighting – torches and diving lights to light some of the features under the water. This isn’t that apparent as all of the images have a similar hue and you would imagine with the use of artificial light especially torches the light temperature would differ from the ambient light created by the daylight, torch-light and most other similar lights having a warm colour cast. Perhaps, the light was filtered to balance with the cold blue Nordic light? Or maybe we’re only presented with images here that were lit by daylight?


 Unusually he also says that he shot a lot of the images at night, possibly because he’s in Norway where over the winter there’s very little daylight. That then reinforces the fact that it could be that he did use a torch with warm light and simply used the correct white balance and made further corrections using Photoshop or similar?

6. What Materials, techniques, processes & equipment were used.
As mentioned earlier, there is some detail about what equipment has been used and as a part of your work you could add images of the equipment and look into some basic details about the equipment. But also write about techniques, processes and materials, you could even draw/sketch an approximation of what you think he may have done using his explanations?


Wednesday 4 November 2015

Simple ten minute digital project - 3D - David Hockney based project

Joiner Ideas, guidance and links for 'David Hockney 3D Project'.

Within the first year one of the units is around exploring the idea of three dimensional work using photography. At the start of this unit we look at David Hockney. Watch the video below, make notes and focus on what he says about the ideas relating to the 3D aspects of this approach. Use the HTML link from the video and this blog now because you've used it as part of your research.

Also look in your text books I'm pretty certain there's a page in the book Photography the Whole Story.


You will be told to use different types of film as part of the current units you're working on. One of them is ILFORD XP2 which you may be able to buy locally at Boots or Snappy Snaps near the college. Don't leave it though till the last minute start looking now. *Note, XP2 will have to be processed at Snappy Snaps or Boots not here at college. Look at the link above and there's some information you can include in your book along with a lot more detail in the product information link.

The other film you must use is Ilford FP4 + This is a film you can buy in college and will have to process yourself. The processing for this film using Rodinal will be 9 minutes. Ask if you're in doubt.

With one of these film you're strongly advised to shoot a contact sheet joiner...
 
https://s-media-cache-ak0.pinimg.com/736x/b8/47/ab/b847abb293b867817fd754b78c24cc99.jpg

I would advise to shoot it in a sequence where you shoot 5 frames per line not six as in this image. Practice it first using your digital camera first...
Again shoot left to right 5 frames at a time gradually working down your subject. You'll need 6 or 7 rows. Then in windows on a PC adjust the view so that it cramps the images so that they line up in rows of 5 and then capture it using print screen and paste into MS Paint to create your digital file.

With all of these tests and trials - write up a plan for the work before you do it and record what materials you're using.

Sunday 20 September 2015

Very Basic stuff in Photoshop

(1). Open Photoshop, go up to the top left hand side and click file - open file - and search for the drive/folder where your images are kept.

(2). One thing that is really important is that you need to keep your original file, so my advice is that if you're playing with Photoshop copy the files that you're going to use and manipulate and put the copies in a new folder.

(3). Having copied the files over to a new folder now click on the file you want to play around with and open it.

(4). Along the top bar on the top left hand side now click 'Image'. A drop-down box appears and about the 2nd option down is the option for 'Adjustments'.
(5). Click on 'Adjustments' and another box appears with several options that you need to explore.

(6). Have a look at the following adjustment tools...

(a). Levels
(b). Curves
(c). Color Balance
(d). Brightness/Contrast
(e). Hue/Saturation
(f). Desaturate

All of these tools affect the colour and the tonality of the images. In some instances where your images are either too dark or too light Levels, curves and brightness/contrast may help to make the images more acceptable.

Color balance and Hue/Saturation all affect the colours in your images and can be used to either dramatically change the colours or correct the colours if they're wrong in some way (Colour cast).

(7). If you like the affect that you're getting with any of these tools, you can save the result once you're happy with it. You should make a note of what it is you've done and how you've done or better still make screen grabs and paste these into a Word File with an explanation of how you've done it and what tools you've used. If you really like the affect that you have used (You should do this for several) go up to the top left hand corner again and click on 'File'.

(8). Select 'Save As' and give the file a new name otherwise you'll 'Over-write' the original file and have to re-copy it from your original file. You could name it using the technique that you've used.

Friday 11 September 2015

Example of sketchbook work.

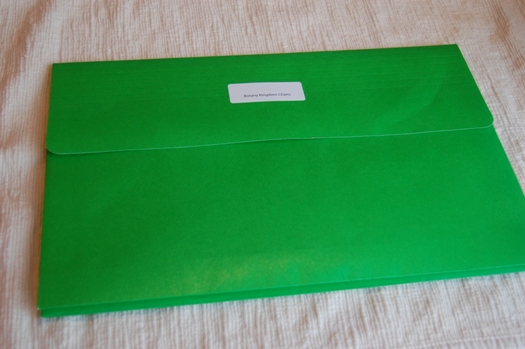
Here's an example of how you might choose to put your work together. At our college we suggest either using the traditional sketchbooks or this method using A3 display folders. The current course leader advocates the use of the traditional hard-back A4 sketchbooks.

The next question we're confronted with is "What the hell do I write and what do I put in it"? Another thing that seems to be lost on students is the work rate and how organised you have to be to get the work completed and in your books.

Question... What the hell do I put in my sketchbook?

There's a number of answers to this - one is everything, the other is the stuff you need to meet the assessment criteria. The bottom line is what-ever you do put in your books, whether it be a minimal approach or an everything approach it does have to meet the assessment criteria.

To this end, it is essential that you engage with this aspect of your work and you make sure you know what it is you've got to do - ask the question "What criteria do I have to meet - what exactly do I have to do"? This information will be on your assignment/brief sheet under the section titled "Assessment Criteria". It tends to be a bit 'wordy' so if you don't understand it, ask someone to explain it to you in terms of what you have to do. If in doubt ask.

Work Rate... Fast and efficient, do it as it happens. Use college time to write stuff up, print things off, read the BJP's, stick your work in your book. Do it there an then!
When you're working in the darkroom where you have to wait for things to happen, don't wait around, use this 'dead time' to write up records and explanations of what you're doing.
Do you travel to college by train? Work on the train?
Set aside time to do the work and do it as it happens.
Diary Style. Work on your book as though it's a diary, do a bit every day, write it as a diary.

Page 1. Always ensure that you have a page that identifies your work with contact details for the college in the event that you lose the work. If it gets left on the train or somewhere the chances are someone will return it. Without this page, you may never see the work again and we cannot assess work that we have never seen.
For our current students, the next page may include the work that was produced prior to joining the course - research work using the British Journal of Photography (Images and you're analysis of the work and the accompanying text).
 
The first lesson was the Visual Language work where we explored and shot images of mugshots over two stages. Simply record what you did, what you were thinking and what you understood of the task at that stage using both images and written work. You could include technical details, but the most important aspects are the visual language aspects - the conventions that relate to creating images that look like a classic police mug-shot discussing the complexities involved in making the image.


 Once you'd shot the first series the results and conventions were discussed and you went out again and we developed the work further aiming to make the work a more convincing version of the classic mug-shot...


As much as you can you're advised to include sketches and drawings. UAL love sketches and drawings and the more you do the less you'll have to write. There's a balance to be had between how much writing you do and how much you illustrate your learning through the use of images (photography or sketches). Potentially you can write a lot less than the example here, but you then need to use images and sketches far more in the process of evidencing your learning and analysis (See the example at the bottom of this post). 
Listen for suggestions in lessons, if an idea or experiment is suggested, you should grab the opportunity and try it out. In the lesson the lecturer discussed the one-eyed aspects of using lenses at different focal lengths. That was a prompt for you to do additional work that would help you attain the higher grades...
.
 
Research is essential and as you go through this course you'll be directed as to how to go about your research at this stage you need to have completed research in conjunction with your practical work you need to do outside of college. (See your brief 'Sinister'). The research at this stage is being directed in that we're pointing you towards specific artists and resources. In response to the artists you're being directed to look at you need to include images and then start the written content offering your initial response to the work prior to reading and learning about it. Once you've offered your opinion and analysis of the work, you then need to read the accompanying text and then write up a summary of the important aspects that relate to your task. This might look like this...


There are loads of examples of how sketchbooks can be put together and a particularly good resources for exploring how others do it is here
On this website you'll find links to videos such as these and you may find them helpful...


Wednesday 27 May 2015

FMP Additional work - "Plan - Do - Reflect".

Plan - Do - reflect.

  • Shoot film - buy a disposable camera test it out on your theme. This is dead easy, whatever your theme is for your FMP do a test shoot using disposable camera. Buy them from Pound Shops or anywhere that sells camera equipment and film (Boots/Snappies)? See at the end of this post a series of prompts for you to consider at the planning stage. When you use these cameras, the main thing you have to consider is the minimum focusing distance. Shoot upright and horizontal, if it's got built in flash - investigate how that can be used. Allow enough time to have the film processed and printed, try and use as many of the images as possible, you could try and annotate most of the images provided that you've varied the way that you shoot your theme. This exercise on it's own with the planning, 24 or more prints and the proper use of the Gibbs reflective practice could generate several pages of content.

  • Use your camera phone. Try your camera phone, dependent on how advanced it is there's probably several of the tests below you could do exploring how well it works as a phone. Again, just try your camera phone how adaptable is it? Does it have a zoom, how well does this work, can you change the settings? Get the manual out and see how good your camera phone is. If it's basic, how bad or good is it, try and get some really good shots with it using your theme, how do they compare with your DSLR? Are they better or worse - why? Again, make sure you plan what you do beforehand and then reflect using Gibbs.

  • Shoot your theme and change your white balance - how does it affect the images? Again dead easy to do and one you can either do using either your subject or the location you're shooting in. Set the camera up and just shoot using all of the white balance settings. Then get the images printed off and line all the images up side by side and make observations about how the images is affected by the changes in the white balance settings. Again remember to plan it first, then do it and then reflect on the outcomes. Make sure you analyse and ask the 'what if 'type questions.

  • Lenses different focal lengths with your theme. What lens focal length works best with your theme/subject. Is the background and the surroundings important in contextualising the scene? If so would the use of a wide angle lens be a good idea? Do a test shoot with your lenses or your zoom lens set at a range of focal lengths to see how the use of the lens focal length affects the image. 18mm, 50mm and 80mm if you've got a short zoom lens. Again - plan it, do it and then reflect.

  • Light - photograph your theme or the location or a location through the day from 5am through to 10pm. Use the daylight white balance mode (Not Auto). ideally shoot your location, a good idea if it's possible is to have your subject in the picture, but considering the amount of time given over to this task, the location or a location would be enough. Shoot the same scene, from the same place with the same focal length (Wide angle is good). Make sure you set the camera to daylight mode in your white balance.
     

Shoot as many hours as you can of the same scene as described above. Print all of the images off making a note of the time each shot was made (Remember precede it with planning). Then annotate the images with regards to two separate aspects. (1). The colour of the light from the early morning through to the evening, how does it change - what effects it and why? (2). The light quality - look at the shadows and make observations with regards to the quality of the light, talk about it in terms of whether it is point light or diffuse light and how does this impact on the image?

  • Aperture - shoot your theme at different apertures from wide down to small (F3.5 - F22).
  • Aperture - bracket your theme using the aperture show under and over - exposure.
  • Shutter speed - from slow to fast moving your subject or associated.
  • ISO - noise - shoot from 100 iso to your fastest setting how does that affect your image.


Planning

Test shoot "Planning Unit 08-2:3".

(1). What light are they hoping for and why?
(2). What camera are they using?
(3). Where are they going to shoot the images?
(4). Who are they going to shoot images of?
(5). What file type/size are they going to use and why?
(6). What lens are they using?
(7). What ISO have they selected and why?
(8). What white balance have they selected and why?
(9). What metering mode have they used and how are they going to make their exposures?
(10). where are they images going to be shot and why?
(11). Who are they going to photograph?
(12). How much time are they going to allocate?
(13). What focal lengths are they going to use?
(14). What shutter speed are they going to use?
(15). Are they going to use a tripod - why/why not?
(16). When do they intend to download the images and make a contact print?
(17). How will they make the contact sheet?
(18). Have they got space on their cards (What size card are they using).
(19). Have they got freshly charged batteries and spare batteries?
(20). Where, when and how the files going to be backed up?
(21). What is it you're going to be testing and the reason.


Gibbs Reflective Practice


Monday 18 May 2015

Research for college photography projects.

Under construction -

Every single project you produce must be under-pinned by research. No photography is original, so whatever the idea you come up with, someone will have already done something like it before. As students studying photography it's important that you acknowledge this fact and therefore reference the work that preceded your work and acknowledge that connection. The easiest way to do this, is to accept that fact and base all of your work around your research - making your research your starting point. Otherwise, you'll produce the work and then have to go looking for something that's connected to your work and that's a poor way of working, lecturers will generally be able to see that's how you've produced your work and you'll run the risk of attaining a low grade.

This is how we recommend you go about your research in order that you attain the high grades...

No.1

Research regularly - learn about photography and photographers. Set aside a couple of hours or more where you use the books and journals. Use your time at college as much as possible to do to your research - between lesson, before and after scheduled classes.

No.2

Use books and journals - Do not use the internet as your starting point if possible. You will be strongly advised to buy a number of books to support your course work


The more you look at photography and read about it, the more you'll learn and understand it. Be very particular about your resources e.g. the material that you use for your research and the way that you conduct your research. We recommend a selection of books and journals that you should make your key resources for your research.


At the end of each year, you have to produce a 'Final Major Project' (FMP). The projects rely on you having good quality research. The research that you do is fundamentally important to all aspects of this course, but especially so when it comes to the two final major projects. The more research you do and the greater diversity of your research the more readily you'll be able to work with and understand what makes photography work , how & why it's produced and how it communicates to its audience.

At the start of the course you'll be shown how to conduct your research and what to use for your research. If you follow these instructions and do as suggested here, you're going to set yourself up to do really well...


One of the first things you'll be shown and introduced to is the LRC (Learning Resources Centre) on the first floor...
 The LRC (Learning Resource Centre) Above. This is a drop-in area, where you can go and study independently. This is where the BJP's are kept along with a number of other Journals. You can get there by lift, you simply stroll in, take the journals from the shelves and read them and photo-copy the pages you need. There are a number of photo-copiers within the centre. Once you go through the door you need to turn right to find the bookcase with the BJP's.
Within the LRC there is a bookcase with The Journals (Magazines), where you'll find the two most useful resources... The British Journal of Photography (BJP) and Hotshoe amongst a few others. As you come through the door indicated 'a' you'll see the book case on the right as indicated by the arrow 'b'.

(Above)This is the bookcase. These journals are the secret to you attaining high grades, accelerating your learning, understanding photography based on concepts and ideas and passing the course with ease.

Here they are - the coveted BJP's (British Journal of Photography). There's about 45-50 copies, every week you need to grab a few copies and have look through them make notes, read the articles and immerse yourself in the photography that you'll find in the magazines. You must pick one article from one of these magazines every week.
Now you're there and you've found them - what do you do? You'll need the following things...

1. A desire to learn about photography and accept that it is something very different to what you've previously perceived.
2. An open mind.
3. The ability to read, make notes and learn.
4. Credits on your photo-copier card (ID card).
5. Access to a photo-copier machine and the ability to figure out how to make colour photo-copies.
6. A folder for your hard-copy research material.

A photo-copier.

A folder to store your 'Hard-copy' research material.


Every week you will now have to go to either the LRC or The Forum (Library) and use either a Journal or a book to identify at least one photographer, ideally you'll use one of the Journals. You will need to do the following...

1. Photo-copy the page you find the photographer/images from.
2. Make a record of the page number, magazine title, number and date.
3. Photo-copy the pages with the images and the article that accompanies the photographers name/images.
4. Each week on your blog you will have to add the 'Bibliography' details to your 'Blog Bibliography' and paste the same details into your Research post for that week.
5. You must keep the photo-copies in a separate research folder.
6. Now armed with the name of the photographer and the name for the 'Body of work' you need to go on-line and find additional research material for your photographer that you've identified from the Journals.
7. When researching on-line you need to use the correct pre-fixes and use national and international publications, galleries and established websites with professional writers and critics.
8. Again, save the web-links and add to your bibliography.
9. Print off the web pages and add to your research folder.
10. Read through the articles and answer in detail...

  • What is the concept/idea behind the photography - what is it about?
  • What or who is it inspired by?
  • What equipment was used?


Research is absolutely essential and under-pins this course wholly. Without good quality research you're going to struggle to pass this course. Remember essentially you're studying photography first and foremost and learning how to use your cameras as you produce the work through a process of trial and error.

Essential to doing well on this course are a number of books...

Photography The Whole Story -  Juliet Hacking and David Campany.
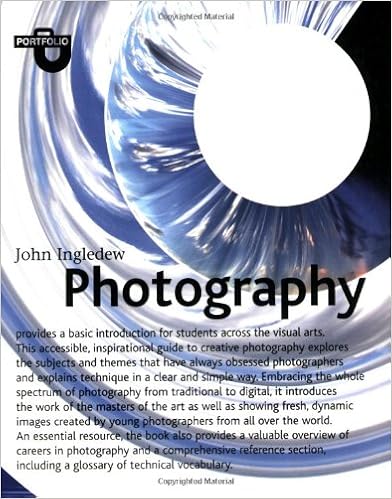
Portfolio (Photography) - John Ingledew 
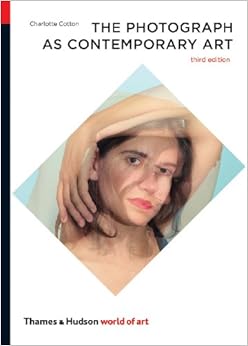
The Photograph as contemporary Art - Charlotte Cotton. 
Experimental Photography (A handbook of techniques) - Marco Antonini.
Langfords Basic Photography - Michael Langford.

You should own these and use these throughout the 2 years you are studying. These books along with 'Journals' are the key to attaining the higher grades and passing the course with ease.
On-line learning - Research. You will need to set up a Google Gmail account. Do this on a PC, don't do it using your phone at the start or a Mac. Keep your email address dead simple - use your full name, if necessary use the first three numbers of your student number if someone has already taken your name. Keep it simple. Make sure you make a note of your password, email address and login (On your phone if necessary).

Then go to Blogger and sign up and get yourself Blogging - see the instructions
here


On-line learning.


1. Start researching now even if that's in Sept - the first week of your second year.Why?
2. You've completed the first year - what kind of photography do you prefer - people, places or objects - when you research look for that kind of photography - keep the theme broad initially. Why?
3. Use high quality 'Hard-copy' research materials - The BJP, Hotshoe and similar journals or books such as these...Why?


4. Do it like this (The Process)...

Step 1. Look through these magazines and books frequently - the more you use these types of resources the quicker you're going to learn and the better quality your learning will be Why?

Step 2. At least once a week choose a photographer/set of images that is associated with your theme/subject Why?

Step 3. Record the title of the book magazine, the writers name, publishing company, date of publication where for your bibliography - do this as you go along. Start a word file or write it down do not forget it or leave it till later Why? 

Step 4. Photo-copy or scan the images and the article in colour.Why?

Step 5. Without reading the article - write up your initial response to the images using the standard prompt sheet. Head this section My Initial response  answer as many of the questions in as much depth as possible.

Step 6. Read the article and then summarise what it is that you have learned about the photographer and the photography. You need to focus on a number of key points...

a. What is the concept behind the images - what are they about and why have they been produced, what is it the photographer is trying to suggest or say through the use of these images - what is the message/meaning? Is it obvious or is it ambiguous - how and why?

b. How is visual language used in the images? Does reading the article firm up your understanding and analysis produced at step 5? Discuss, mood, composition, colour, light, body language, shape, form, facial expressions etc.

c. Who or what are the images inspired by - print off such images if discussed by the photographer and comment on the connections between the two.

d. Does the article discuss materials, techniques, processes and equipment - if so what was used, how and why?

e. What key points do you like - what is it that you could borrow and use in your photography, does it help you understand the concept and idea for your own work?

Step 7. Using the name of the photographer and the body of work - look it up on the internet - add further images and look for more research material - especially interviews or articles written by experts, critics, reviewers from national newspapers and galleries. Keep the links and add to your bibliography. Print off the articles and images.

Step 8. Get all of this work stapled  and kept together.

Step 9. Put the copied images and the article in a 'Research Folder' write down the book/magazine you got them from on the photo-copies so you can cross reference with the bibliography later on.


Step 10. Repeat the process once a week. Why?