Thursday, 8 October 2015
Sunday, 20 September 2015
Very Basic stuff in Photoshop
(1). Open Photoshop, go up to the top left hand side and click file - open file - and search for the drive/folder where your images are kept.
(2). One thing that is really important is that you need to keep your original file, so my advice is that if you're playing with Photoshop copy the files that you're going to use and manipulate and put the copies in a new folder.
(3). Having copied the files over to a new folder now click on the file you want to play around with and open it.
(4). Along the top bar on the top left hand side now click 'Image'. A drop-down box appears and about the 2nd option down is the option for 'Adjustments'.
(a). Levels
(b). Curves
(c). Color Balance
(d). Brightness/Contrast
(e). Hue/Saturation
(f). Desaturate
All of these tools affect the colour and the tonality of the images. In some instances where your images are either too dark or too light Levels, curves and brightness/contrast may help to make the images more acceptable.
Color balance and Hue/Saturation all affect the colours in your images and can be used to either dramatically change the colours or correct the colours if they're wrong in some way (Colour cast).
(7). If you like the affect that you're getting with any of these tools, you can save the result once you're happy with it. You should make a note of what it is you've done and how you've done or better still make screen grabs and paste these into a Word File with an explanation of how you've done it and what tools you've used. If you really like the affect that you have used (You should do this for several) go up to the top left hand corner again and click on 'File'.
(8). Select 'Save As' and give the file a new name otherwise you'll 'Over-write' the original file and have to re-copy it from your original file. You could name it using the technique that you've used.
(2). One thing that is really important is that you need to keep your original file, so my advice is that if you're playing with Photoshop copy the files that you're going to use and manipulate and put the copies in a new folder.
(3). Having copied the files over to a new folder now click on the file you want to play around with and open it.
(4). Along the top bar on the top left hand side now click 'Image'. A drop-down box appears and about the 2nd option down is the option for 'Adjustments'.
(5). Click on 'Adjustments' and another box appears with several options that you need to explore.
(6). Have a look at the following adjustment tools...(a). Levels
(b). Curves
(c). Color Balance
(d). Brightness/Contrast
(e). Hue/Saturation
(f). Desaturate
All of these tools affect the colour and the tonality of the images. In some instances where your images are either too dark or too light Levels, curves and brightness/contrast may help to make the images more acceptable.
Color balance and Hue/Saturation all affect the colours in your images and can be used to either dramatically change the colours or correct the colours if they're wrong in some way (Colour cast).
(7). If you like the affect that you're getting with any of these tools, you can save the result once you're happy with it. You should make a note of what it is you've done and how you've done or better still make screen grabs and paste these into a Word File with an explanation of how you've done it and what tools you've used. If you really like the affect that you have used (You should do this for several) go up to the top left hand corner again and click on 'File'.
(8). Select 'Save As' and give the file a new name otherwise you'll 'Over-write' the original file and have to re-copy it from your original file. You could name it using the technique that you've used.
Friday, 11 September 2015
Example of sketchbook work.
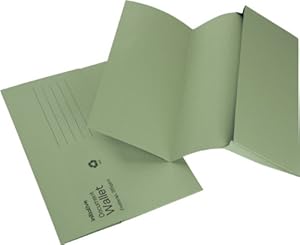
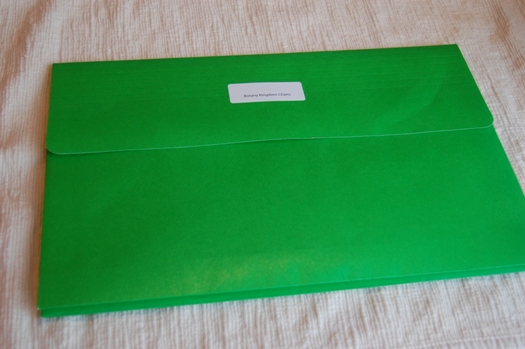
Here's an example of how you might choose to put your work together. At our college we suggest either using the traditional sketchbooks or this method using A3 display folders. The current course leader advocates the use of the traditional hard-back A4 sketchbooks.
The next question we're confronted with is "What the hell do I write and what do I put in it"? Another thing that seems to be lost on students is the work rate and how organised you have to be to get the work completed and in your books.
Question... What the hell do I put in my sketchbook?
There's a number of answers to this - one is everything, the other is the stuff you need to meet the assessment criteria. The bottom line is what-ever you do put in your books, whether it be a minimal approach or an everything approach it does have to meet the assessment criteria.
To this end, it is essential that you engage with this aspect of your work and you make sure you know what it is you've got to do - ask the question "What criteria do I have to meet - what exactly do I have to do"? This information will be on your assignment/brief sheet under the section titled "Assessment Criteria". It tends to be a bit 'wordy' so if you don't understand it, ask someone to explain it to you in terms of what you have to do. If in doubt ask.
Work Rate... Fast and efficient, do it as it happens. Use college time to write stuff up, print things off, read the BJP's, stick your work in your book. Do it there an then!
When you're working in the darkroom where you have to wait for things to happen, don't wait around, use this 'dead time' to write up records and explanations of what you're doing.
Do you travel to college by train? Work on the train?
Set aside time to do the work and do it as it happens.
Diary Style. Work on your book as though it's a diary, do a bit every day, write it as a diary.
Page 1. Always ensure that you have a page that identifies your work with contact details for the college in the event that you lose the work. If it gets left on the train or somewhere the chances are someone will return it. Without this page, you may never see the work again and we cannot assess work that we have never seen.
Once you'd shot the first series the results and conventions were discussed and you went out again and we developed the work further aiming to make the work a more convincing version of the classic mug-shot...
The next question we're confronted with is "What the hell do I write and what do I put in it"? Another thing that seems to be lost on students is the work rate and how organised you have to be to get the work completed and in your books.
Question... What the hell do I put in my sketchbook?
There's a number of answers to this - one is everything, the other is the stuff you need to meet the assessment criteria. The bottom line is what-ever you do put in your books, whether it be a minimal approach or an everything approach it does have to meet the assessment criteria.
To this end, it is essential that you engage with this aspect of your work and you make sure you know what it is you've got to do - ask the question "What criteria do I have to meet - what exactly do I have to do"? This information will be on your assignment/brief sheet under the section titled "Assessment Criteria". It tends to be a bit 'wordy' so if you don't understand it, ask someone to explain it to you in terms of what you have to do. If in doubt ask.
Work Rate... Fast and efficient, do it as it happens. Use college time to write stuff up, print things off, read the BJP's, stick your work in your book. Do it there an then!
When you're working in the darkroom where you have to wait for things to happen, don't wait around, use this 'dead time' to write up records and explanations of what you're doing.
Do you travel to college by train? Work on the train?
Set aside time to do the work and do it as it happens.
Diary Style. Work on your book as though it's a diary, do a bit every day, write it as a diary.
Page 1. Always ensure that you have a page that identifies your work with contact details for the college in the event that you lose the work. If it gets left on the train or somewhere the chances are someone will return it. Without this page, you may never see the work again and we cannot assess work that we have never seen.
For our current students, the next page may include the work that was produced prior to joining the course - research work using the British Journal of Photography (Images and you're analysis of the work and the accompanying text).
The first lesson was the Visual Language work where we explored and shot images of mugshots over two stages. Simply record what you did, what you were thinking and what you understood of the task at that stage using both images and written work. You could include technical details, but the most important aspects are the visual language aspects - the conventions that relate to creating images that look like a classic police mug-shot discussing the complexities involved in making the image.
Once you'd shot the first series the results and conventions were discussed and you went out again and we developed the work further aiming to make the work a more convincing version of the classic mug-shot...
As much as you can you're advised to include sketches and drawings. UAL love sketches and drawings and the more you do the less you'll have to write. There's a balance to be had between how much writing you do and how much you illustrate your learning through the use of images (photography or sketches). Potentially you can write a lot less than the example here, but you then need to use images and sketches far more in the process of evidencing your learning and analysis (See the example at the bottom of this post).
Listen for suggestions in lessons, if an idea or experiment is suggested, you should grab the opportunity and try it out. In the lesson the lecturer discussed the one-eyed aspects of using lenses at different focal lengths. That was a prompt for you to do additional work that would help you attain the higher grades...
.
Research is essential and as you go through this course you'll be directed as to how to go about your research at this stage you need to have completed research in conjunction with your practical work you need to do outside of college. (See your brief 'Sinister'). The research at this stage is being directed in that we're pointing you towards specific artists and resources. In response to the artists you're being directed to look at you need to include images and then start the written content offering your initial response to the work prior to reading and learning about it. Once you've offered your opinion and analysis of the work, you then need to read the accompanying text and then write up a summary of the important aspects that relate to your task. This might look like this...
There are loads of examples of how sketchbooks can be put together and a particularly good resources for exploring how others do it is here
On this website you'll find links to videos such as these and you may find them helpful...
Labels:
a-level,
AS,
BTEC,
example,
help with,
how to,
sketchbooks,
UAL,
visual language,
what should I
Wednesday, 27 May 2015
FMP Additional work - "Plan - Do - Reflect".
Plan - Do - reflect.

Shoot as many hours as you can of the same scene as described above. Print all of the images off making a note of the time each shot was made (Remember precede it with planning). Then annotate the images with regards to two separate aspects. (1). The colour of the light from the early morning through to the evening, how does it change - what effects it and why? (2). The light quality - look at the shadows and make observations with regards to the quality of the light, talk about it in terms of whether it is point light or diffuse light and how does this impact on the image?
Planning
Test shoot "Planning Unit 08-2:3".
(1). What light are they hoping for and why?
(2). What camera are they using?
(3). Where are they going to shoot the images?
(4). Who are they going to shoot images of?
(5). What file type/size are they going to use and why?
(6). What lens are they using?
(7). What ISO have they selected and why?
(8). What white balance have they selected and why?
(9). What metering mode have they used and how are they going to make their exposures?
(10). where are they images going to be shot and why?
(11). Who are they going to photograph?
(12). How much time are they going to allocate?
(13). What focal lengths are they going to use?
(14). What shutter speed are they going to use?
(15). Are they going to use a tripod - why/why not?
(16). When do they intend to download the images and make a contact print?
(17). How will they make the contact sheet?
(18). Have they got space on their cards (What size card are they using).
(19). Have they got freshly charged batteries and spare batteries?
(20). Where, when and how the files going to be backed up?
(21). What is it you're going to be testing and the reason.
Gibbs Reflective Practice
- Shoot film - buy a disposable camera test it out on your theme. This is dead easy, whatever your theme is for your FMP do a test shoot using disposable camera. Buy them from Pound Shops or anywhere that sells camera equipment and film (Boots/Snappies)? See at the end of this post a series of prompts for you to consider at the planning stage. When you use these cameras, the main thing you have to consider is the minimum focusing distance. Shoot upright and horizontal, if it's got built in flash - investigate how that can be used. Allow enough time to have the film processed and printed, try and use as many of the images as possible, you could try and annotate most of the images provided that you've varied the way that you shoot your theme. This exercise on it's own with the planning, 24 or more prints and the proper use of the Gibbs reflective practice could generate several pages of content.
- Use your camera phone. Try your camera phone, dependent on how advanced it is there's probably several of the tests below you could do exploring how well it works as a phone. Again, just try your camera phone how adaptable is it? Does it have a zoom, how well does this work, can you change the settings? Get the manual out and see how good your camera phone is. If it's basic, how bad or good is it, try and get some really good shots with it using your theme, how do they compare with your DSLR? Are they better or worse - why? Again, make sure you plan what you do beforehand and then reflect using Gibbs.
- Shoot your theme and change your white balance - how does it affect the images? Again dead easy to do and one you can either do using either your subject or the location you're shooting in. Set the camera up and just shoot using all of the white balance settings. Then get the images printed off and line all the images up side by side and make observations about how the images is affected by the changes in the white balance settings. Again remember to plan it first, then do it and then reflect on the outcomes. Make sure you analyse and ask the 'what if 'type questions.
- Lenses different focal lengths with your theme. What lens focal length works best with your theme/subject. Is the background and the surroundings important in contextualising the scene? If so would the use of a wide angle lens be a good idea? Do a test shoot with your lenses or your zoom lens set at a range of focal lengths to see how the use of the lens focal length affects the image. 18mm, 50mm and 80mm if you've got a short zoom lens. Again - plan it, do it and then reflect.
- Light - photograph your theme or the location or a location through the day from 5am through to 10pm. Use the daylight white balance mode (Not Auto). ideally shoot your location, a good idea if it's possible is to have your subject in the picture, but considering the amount of time given over to this task, the location or a location would be enough. Shoot the same scene, from the same place with the same focal length (Wide angle is good). Make sure you set the camera to daylight mode in your white balance.
Shoot as many hours as you can of the same scene as described above. Print all of the images off making a note of the time each shot was made (Remember precede it with planning). Then annotate the images with regards to two separate aspects. (1). The colour of the light from the early morning through to the evening, how does it change - what effects it and why? (2). The light quality - look at the shadows and make observations with regards to the quality of the light, talk about it in terms of whether it is point light or diffuse light and how does this impact on the image?
- Aperture - shoot your theme at different apertures from wide down to small (F3.5 - F22).
- Aperture - bracket your theme using the aperture show under and over - exposure.
- Shutter speed - from slow to fast moving your subject or associated.
- ISO - noise - shoot from 100 iso to your fastest setting how does that affect your image.
Planning
Test shoot "Planning Unit 08-2:3".
(1). What light are they hoping for and why?
(2). What camera are they using?
(3). Where are they going to shoot the images?
(4). Who are they going to shoot images of?
(5). What file type/size are they going to use and why?
(6). What lens are they using?
(7). What ISO have they selected and why?
(8). What white balance have they selected and why?
(9). What metering mode have they used and how are they going to make their exposures?
(10). where are they images going to be shot and why?
(11). Who are they going to photograph?
(12). How much time are they going to allocate?
(13). What focal lengths are they going to use?
(14). What shutter speed are they going to use?
(15). Are they going to use a tripod - why/why not?
(16). When do they intend to download the images and make a contact print?
(17). How will they make the contact sheet?
(18). Have they got space on their cards (What size card are they using).
(19). Have they got freshly charged batteries and spare batteries?
(20). Where, when and how the files going to be backed up?
(21). What is it you're going to be testing and the reason.
Gibbs Reflective Practice
Monday, 18 May 2015
Research for college photography projects.
Under construction -
Every single project you produce must be under-pinned by research. No photography is original, so whatever the idea you come up with, someone will have already done something like it before. As students studying photography it's important that you acknowledge this fact and therefore reference the work that preceded your work and acknowledge that connection. The easiest way to do this, is to accept that fact and base all of your work around your research - making your research your starting point. Otherwise, you'll produce the work and then have to go looking for something that's connected to your work and that's a poor way of working, lecturers will generally be able to see that's how you've produced your work and you'll run the risk of attaining a low grade.
This is how we recommend you go about your research in order that you attain the high grades...
No.1
Research regularly - learn about photography and photographers. Set aside a couple of hours or more where you use the books and journals. Use your time at college as much as possible to do to your research - between lesson, before and after scheduled classes.
No.2
Use books and journals - Do not use the internet as your starting point if possible. You will be strongly advised to buy a number of books to support your course work
The more you look at photography and read about it, the more you'll learn and understand it. Be very particular about your resources e.g. the material that you use for your research and the way that you conduct your research. We recommend a selection of books and journals that you should make your key resources for your research.
At the end of each year, you have to produce a 'Final Major Project' (FMP). The projects rely on you having good quality research. The research that you do is fundamentally important to all aspects of this course, but especially so when it comes to the two final major projects. The more research you do and the greater diversity of your research the more readily you'll be able to work with and understand what makes photography work , how & why it's produced and how it communicates to its audience.
At the start of the course you'll be shown how to conduct your research and what to use for your research. If you follow these instructions and do as suggested here, you're going to set yourself up to do really well...
One of the first things you'll be shown and introduced to is the LRC (Learning Resources Centre) on the first floor...
The LRC (Learning Resource Centre) Above. This is a drop-in area, where you can go and study independently. This is where the BJP's are kept along with a number of other Journals. You can get there by lift, you simply stroll in, take the journals from the shelves and read them and photo-copy the pages you need. There are a number of photo-copiers within the centre. Once you go through the door you need to turn right to find the bookcase with the BJP's.
Within the LRC there is a bookcase with The Journals (Magazines), where you'll find the two most useful resources... The British Journal of Photography (BJP) and Hotshoe amongst a few others. As you come through the door indicated 'a' you'll see the book case on the right as indicated by the arrow 'b'.
(Above)This is the bookcase. These journals are the secret to you attaining high grades, accelerating your learning, understanding photography based on concepts and ideas and passing the course with ease.
Here they are - the coveted BJP's (British Journal of Photography). There's about 45-50 copies, every week you need to grab a few copies and have look through them make notes, read the articles and immerse yourself in the photography that you'll find in the magazines. You must pick one article from one of these magazines every week.
Now you're there and you've found them - what do you do? You'll need the following things...
1. A desire to learn about photography and accept that it is something very different to what you've previously perceived.
2. An open mind.
3. The ability to read, make notes and learn.
4. Credits on your photo-copier card (ID card).
5. Access to a photo-copier machine and the ability to figure out how to make colour photo-copies.
6. A folder for your hard-copy research material.

A photo-copier.

A folder to store your 'Hard-copy' research material.
Every week you will now have to go to either the LRC or The Forum (Library) and use either a Journal or a book to identify at least one photographer, ideally you'll use one of the Journals. You will need to do the following...
1. Photo-copy the page you find the photographer/images from.
2. Make a record of the page number, magazine title, number and date.
3. Photo-copy the pages with the images and the article that accompanies the photographers name/images.
4. Each week on your blog you will have to add the 'Bibliography' details to your 'Blog Bibliography' and paste the same details into your Research post for that week.
5. You must keep the photo-copies in a separate research folder.
6. Now armed with the name of the photographer and the name for the 'Body of work' you need to go on-line and find additional research material for your photographer that you've identified from the Journals.
7. When researching on-line you need to use the correct pre-fixes and use national and international publications, galleries and established websites with professional writers and critics.
8. Again, save the web-links and add to your bibliography.
9. Print off the web pages and add to your research folder.
10. Read through the articles and answer in detail...
Research is absolutely essential and under-pins this course wholly. Without good quality research you're going to struggle to pass this course. Remember essentially you're studying photography first and foremost and learning how to use your cameras as you produce the work through a process of trial and error.
Essential to doing well on this course are a number of books...
Photography The Whole Story - Juliet Hacking and David Campany.
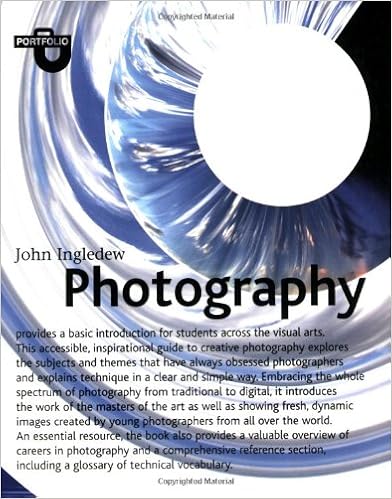
Portfolio (Photography) - John Ingledew
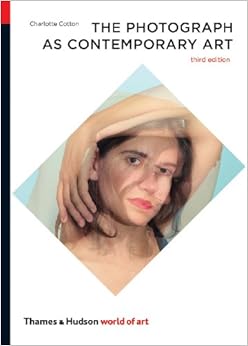
The Photograph as contemporary Art - Charlotte Cotton.
Experimental Photography (A handbook of techniques) - Marco Antonini.
Langfords Basic Photography - Michael Langford.
You should own these and use these throughout the 2 years you are studying. These books along with 'Journals' are the key to attaining the higher grades and passing the course with ease.
Then go to Blogger and sign up and get yourself Blogging - see the instructions here
On-line learning.
1. Start researching now even if that's in Sept - the first week of your second year.Why?
2. You've completed the first year - what kind of photography do you prefer - people, places or objects - when you research look for that kind of photography - keep the theme broad initially. Why?
3. Use high quality 'Hard-copy' research materials - The BJP, Hotshoe and similar journals or books such as these...Why?


4. Do it like this (The Process)...
Step 1. Look through these magazines and books frequently - the more you use these types of resources the quicker you're going to learn and the better quality your learning will be Why?
Step 2. At least once a week choose a photographer/set of images that is associated with your theme/subject Why?
Step 3. Record the title of the book magazine, the writers name, publishing company, date of publication where for your bibliography - do this as you go along. Start a word file or write it down do not forget it or leave it till later Why?
Step 4. Photo-copy or scan the images and the article in colour.Why?
Step 5. Without reading the article - write up your initial response to the images using the standard prompt sheet. Head this section My Initial response answer as many of the questions in as much depth as possible.
Step 6. Read the article and then summarise what it is that you have learned about the photographer and the photography. You need to focus on a number of key points...
a. What is the concept behind the images - what are they about and why have they been produced, what is it the photographer is trying to suggest or say through the use of these images - what is the message/meaning? Is it obvious or is it ambiguous - how and why?
b. How is visual language used in the images? Does reading the article firm up your understanding and analysis produced at step 5? Discuss, mood, composition, colour, light, body language, shape, form, facial expressions etc.
c. Who or what are the images inspired by - print off such images if discussed by the photographer and comment on the connections between the two.
d. Does the article discuss materials, techniques, processes and equipment - if so what was used, how and why?
e. What key points do you like - what is it that you could borrow and use in your photography, does it help you understand the concept and idea for your own work?
Step 7. Using the name of the photographer and the body of work - look it up on the internet - add further images and look for more research material - especially interviews or articles written by experts, critics, reviewers from national newspapers and galleries. Keep the links and add to your bibliography. Print off the articles and images.
Step 8. Get all of this work stapled and kept together.
Step 9. Put the copied images and the article in a 'Research Folder' write down the book/magazine you got them from on the photo-copies so you can cross reference with the bibliography later on.

Step 10. Repeat the process once a week. Why?
Every single project you produce must be under-pinned by research. No photography is original, so whatever the idea you come up with, someone will have already done something like it before. As students studying photography it's important that you acknowledge this fact and therefore reference the work that preceded your work and acknowledge that connection. The easiest way to do this, is to accept that fact and base all of your work around your research - making your research your starting point. Otherwise, you'll produce the work and then have to go looking for something that's connected to your work and that's a poor way of working, lecturers will generally be able to see that's how you've produced your work and you'll run the risk of attaining a low grade.
This is how we recommend you go about your research in order that you attain the high grades...
No.1
Research regularly - learn about photography and photographers. Set aside a couple of hours or more where you use the books and journals. Use your time at college as much as possible to do to your research - between lesson, before and after scheduled classes.
No.2
Use books and journals - Do not use the internet as your starting point if possible. You will be strongly advised to buy a number of books to support your course work
The more you look at photography and read about it, the more you'll learn and understand it. Be very particular about your resources e.g. the material that you use for your research and the way that you conduct your research. We recommend a selection of books and journals that you should make your key resources for your research.
At the end of each year, you have to produce a 'Final Major Project' (FMP). The projects rely on you having good quality research. The research that you do is fundamentally important to all aspects of this course, but especially so when it comes to the two final major projects. The more research you do and the greater diversity of your research the more readily you'll be able to work with and understand what makes photography work , how & why it's produced and how it communicates to its audience.
At the start of the course you'll be shown how to conduct your research and what to use for your research. If you follow these instructions and do as suggested here, you're going to set yourself up to do really well...
One of the first things you'll be shown and introduced to is the LRC (Learning Resources Centre) on the first floor...
The LRC (Learning Resource Centre) Above. This is a drop-in area, where you can go and study independently. This is where the BJP's are kept along with a number of other Journals. You can get there by lift, you simply stroll in, take the journals from the shelves and read them and photo-copy the pages you need. There are a number of photo-copiers within the centre. Once you go through the door you need to turn right to find the bookcase with the BJP's.
Within the LRC there is a bookcase with The Journals (Magazines), where you'll find the two most useful resources... The British Journal of Photography (BJP) and Hotshoe amongst a few others. As you come through the door indicated 'a' you'll see the book case on the right as indicated by the arrow 'b'.
(Above)This is the bookcase. These journals are the secret to you attaining high grades, accelerating your learning, understanding photography based on concepts and ideas and passing the course with ease.
Here they are - the coveted BJP's (British Journal of Photography). There's about 45-50 copies, every week you need to grab a few copies and have look through them make notes, read the articles and immerse yourself in the photography that you'll find in the magazines. You must pick one article from one of these magazines every week.
Now you're there and you've found them - what do you do? You'll need the following things...
1. A desire to learn about photography and accept that it is something very different to what you've previously perceived.
2. An open mind.
3. The ability to read, make notes and learn.
4. Credits on your photo-copier card (ID card).
5. Access to a photo-copier machine and the ability to figure out how to make colour photo-copies.
6. A folder for your hard-copy research material.

A photo-copier.

A folder to store your 'Hard-copy' research material.
Every week you will now have to go to either the LRC or The Forum (Library) and use either a Journal or a book to identify at least one photographer, ideally you'll use one of the Journals. You will need to do the following...
1. Photo-copy the page you find the photographer/images from.
2. Make a record of the page number, magazine title, number and date.
3. Photo-copy the pages with the images and the article that accompanies the photographers name/images.
4. Each week on your blog you will have to add the 'Bibliography' details to your 'Blog Bibliography' and paste the same details into your Research post for that week.
5. You must keep the photo-copies in a separate research folder.
6. Now armed with the name of the photographer and the name for the 'Body of work' you need to go on-line and find additional research material for your photographer that you've identified from the Journals.
7. When researching on-line you need to use the correct pre-fixes and use national and international publications, galleries and established websites with professional writers and critics.
8. Again, save the web-links and add to your bibliography.
9. Print off the web pages and add to your research folder.
10. Read through the articles and answer in detail...
- What is the concept/idea behind the photography - what is it about?
- What or who is it inspired by?
- What equipment was used?
Research is absolutely essential and under-pins this course wholly. Without good quality research you're going to struggle to pass this course. Remember essentially you're studying photography first and foremost and learning how to use your cameras as you produce the work through a process of trial and error.
Essential to doing well on this course are a number of books...
Photography The Whole Story - Juliet Hacking and David Campany.
Portfolio (Photography) - John Ingledew
The Photograph as contemporary Art - Charlotte Cotton.
Experimental Photography (A handbook of techniques) - Marco Antonini.
Langfords Basic Photography - Michael Langford.
You should own these and use these throughout the 2 years you are studying. These books along with 'Journals' are the key to attaining the higher grades and passing the course with ease.
Then go to Blogger and sign up and get yourself Blogging - see the instructions here
On-line learning.
1. Start researching now even if that's in Sept - the first week of your second year.Why?
2. You've completed the first year - what kind of photography do you prefer - people, places or objects - when you research look for that kind of photography - keep the theme broad initially. Why?
3. Use high quality 'Hard-copy' research materials - The BJP, Hotshoe and similar journals or books such as these...Why?


4. Do it like this (The Process)...
Step 1. Look through these magazines and books frequently - the more you use these types of resources the quicker you're going to learn and the better quality your learning will be Why?
Step 2. At least once a week choose a photographer/set of images that is associated with your theme/subject Why?
Step 3. Record the title of the book magazine, the writers name, publishing company, date of publication where for your bibliography - do this as you go along. Start a word file or write it down do not forget it or leave it till later Why?
Step 4. Photo-copy or scan the images and the article in colour.Why?
Step 5. Without reading the article - write up your initial response to the images using the standard prompt sheet. Head this section My Initial response answer as many of the questions in as much depth as possible.
Step 6. Read the article and then summarise what it is that you have learned about the photographer and the photography. You need to focus on a number of key points...
a. What is the concept behind the images - what are they about and why have they been produced, what is it the photographer is trying to suggest or say through the use of these images - what is the message/meaning? Is it obvious or is it ambiguous - how and why?
b. How is visual language used in the images? Does reading the article firm up your understanding and analysis produced at step 5? Discuss, mood, composition, colour, light, body language, shape, form, facial expressions etc.
c. Who or what are the images inspired by - print off such images if discussed by the photographer and comment on the connections between the two.
d. Does the article discuss materials, techniques, processes and equipment - if so what was used, how and why?
e. What key points do you like - what is it that you could borrow and use in your photography, does it help you understand the concept and idea for your own work?
Step 7. Using the name of the photographer and the body of work - look it up on the internet - add further images and look for more research material - especially interviews or articles written by experts, critics, reviewers from national newspapers and galleries. Keep the links and add to your bibliography. Print off the articles and images.
Step 8. Get all of this work stapled and kept together.
Step 9. Put the copied images and the article in a 'Research Folder' write down the book/magazine you got them from on the photo-copies so you can cross reference with the bibliography later on.

Step 10. Repeat the process once a week. Why?
Labels:
on-line learning,
Photography,
Research,
UAL. level 3,
weekly
Thursday, 14 May 2015
Camera Basics - Exposure and Light Metering
Camera Basics Exposure and Light Metering.
Use your books to investigate the following in more depth.
Langfords Basic Photography
Portfolio Photography
Also use this website here
Your camera isn't going to be able to make the correct exposures in all situations. A lot of the time it will, but as you get better and start to photograph things that have interesting light, you'll see that your images will be over or under exposed. Additionally you might start to make decisions about why you may intentionally want the images to appear to be over or under exposed.
In order to ascertain whether something is over or under exposed you have to have some sense of what is generally acceptable or what it is you want to see in the image. As a rule in most instances people/clients/the viewer/your audience will want to see detail, colour, tone, form and shape as seen with the human eye. Replicating what the eye sees though with a camera, once you start to become more discerning and critical becomes slightly more complex. To get a sense of how exposure is used in a broad range of situations you just simply need to be looking at as much photography as you can. Ideally using the books we recommend of the journals and magazines in the Learning Resources Centre. The more you look at images and the more you read about photography, the more you'll learn, experiment and try the things you see and read about and be ready to learn through a process of trial and error.
The basics.
Your DSLR camera and SLR cameras as a rule with have an internal through "the lens metering system" TTL metering.
Your camera assumes the world is made up of mid - tones and in situations where this is true the TTL metering system will produce images that are 'Exposed' correctly e.g. not too dark and not too light. The camera reads the light that is being reflected off of the subject and when the subject is a mid tone if used in Auto Mode it'll come up with an exposure value (Combination of shutter speed and aperture).
We recommend that from the start you begin to familiarise yourself with your cameras Manual mode. This is set my turning the dial on top of the camera to 'M'.
Ideally you'll want to produce the best quality images and in order to do this the camera has to be set up in a way to achieve this. The basics of exposure include the setting of the cameras sensitivity to the light. This is done through the use of the ISO settings accessed either on the body of the camera or through the menu. Different cameras have different menu settings and it is your responsibility to read your manual and familiarise yourself with these basic settings.
Lower ISO values produce better quality images, so for the most part you should be aiming to shoot at 100 iso and learn how to overcome all of the problems that using 100 iso comes with. (You'll come to this later).
Setting your ISO to 100.
Generally your ISO settings will be accessed via the menu via a couple of clicks via the camera symbol and then by scrolling down and selecting 'ISO sensitivity'.

You'll then reach the fine tuning part of the ISO settings...

Turn ISO sensitivity OFF!
The main thing you now need to do is make sure your ISO settings are not on 'Auto'. Scroll right and make sure you select manual set up -choosing 100 ISO. If you don't choose to manual your camera will not be working in a way where you've taken control of the camera and the exposure and the camera will continue to make decisions for you that will restrict your learning. Remember you need to learn by trial and error and by making mistakes and learning how to correct the mistakes. If you use this approach you will gain a far better understanding of photography and light.
You've now gained control of your camera and the process of using the camera with the ISO set to 100 iso will give you a far greater understanding of light levels and exposure. The more you use your camera in this manner restricting yourself to 100 iso and 400 iso as much as you can, the greater your appreciation of light levels and exposure will be.
Once set, on the back of your camera (or on top), you'll see and be able to check to see that your camera is set to 100 ISO. (No.1) in figure 1. This must not be set to Auto. Again have a look at your manual if you're unsure of how to set this or speak to your teachers.
We're insisting that you do this in order for you to grasp the difference in light levels and quickly light fades away when you move around a subject or from one space to another. This is not apparent with our eyes. When we move from one room to another, or from indoors to outside, we're rarely that aware of how different the light is. Our eyes and brains work to makes sense of the light and make the transition from one light source to another seamless. Film and digital sensors cannot do this in the same way that our eyes do, but when a DSLR camera is set on Auto ISO, I makes a damn good effort to do so and in doing so makes you lazy and unaware of how variable the light is. As light and the measurement of light is key to what we do as photographers it is essential that you appreciate the variation in light levels in your pursuit of images.
Shutter Speed.
Initially when you start to make images when you're learning we'll be advising you to always try and shoot at 1/125 of a second. This is your shutter speed. You'll be shown a demo using a Pentax K1000 where you'll see the shutter working and the affect it has when being used at different speeds.
It's the 1/125 is shutter speed that enables you to capture basic everyday movement, freezing it so that there is no blur. It's fast enough to also compensate for your own body movement so reducing 'Camera shake'.
In order to use the camera at this shutter speed you will have to be in a place where there is a lot of light. A lot of light basically means daylight outside. Anywhere else and you'll start to get problems, so when you start to shoot in this manner (ISO 100 at 1/125 shutter speed) always look to shoot your images in very bright light until you get some sense of how bright/dark different lighting conditions are.
The shutter speed is normally adjusted using the knurled wheel on the front or top of your camera body. Make the adjustments until it reaches the 1/125 shutter speed. This value is a speed at which the shutter allows the light to fall on to the cameras sensor to form the image.
Eventually we're now at the stage where you'll make an exposure calculation.
On your camera either on top of the body or on the menu display on the back of the camera you'll have feature that looks either like this..
Or like this...
You'll notice that both have a feature that looks like a dotted line with a + symbol at one end and a - symbol at the opposite end. This is your light metering system when you're using the camera in manual mode. When your dial is set to 'Manual' the display read out will include the large 'M' on the display to confirm that you're in 'Manual Mode'.
Note. The more you keep this simple when you start the quicker you'll learn the basics.
Use your books to investigate the following in more depth.
Langfords Basic Photography
Portfolio Photography
Also use this website here
Your camera isn't going to be able to make the correct exposures in all situations. A lot of the time it will, but as you get better and start to photograph things that have interesting light, you'll see that your images will be over or under exposed. Additionally you might start to make decisions about why you may intentionally want the images to appear to be over or under exposed.
In order to ascertain whether something is over or under exposed you have to have some sense of what is generally acceptable or what it is you want to see in the image. As a rule in most instances people/clients/the viewer/your audience will want to see detail, colour, tone, form and shape as seen with the human eye. Replicating what the eye sees though with a camera, once you start to become more discerning and critical becomes slightly more complex. To get a sense of how exposure is used in a broad range of situations you just simply need to be looking at as much photography as you can. Ideally using the books we recommend of the journals and magazines in the Learning Resources Centre. The more you look at images and the more you read about photography, the more you'll learn, experiment and try the things you see and read about and be ready to learn through a process of trial and error.
The basics.
Your DSLR camera and SLR cameras as a rule with have an internal through "the lens metering system" TTL metering.
Your camera assumes the world is made up of mid - tones and in situations where this is true the TTL metering system will produce images that are 'Exposed' correctly e.g. not too dark and not too light. The camera reads the light that is being reflected off of the subject and when the subject is a mid tone if used in Auto Mode it'll come up with an exposure value (Combination of shutter speed and aperture).
We recommend that from the start you begin to familiarise yourself with your cameras Manual mode. This is set my turning the dial on top of the camera to 'M'.
Ideally you'll want to produce the best quality images and in order to do this the camera has to be set up in a way to achieve this. The basics of exposure include the setting of the cameras sensitivity to the light. This is done through the use of the ISO settings accessed either on the body of the camera or through the menu. Different cameras have different menu settings and it is your responsibility to read your manual and familiarise yourself with these basic settings.
Lower ISO values produce better quality images, so for the most part you should be aiming to shoot at 100 iso and learn how to overcome all of the problems that using 100 iso comes with. (You'll come to this later).
Setting your ISO to 100.
Generally your ISO settings will be accessed via the menu via a couple of clicks via the camera symbol and then by scrolling down and selecting 'ISO sensitivity'.

You'll then reach the fine tuning part of the ISO settings...

Turn ISO sensitivity OFF!
The main thing you now need to do is make sure your ISO settings are not on 'Auto'. Scroll right and make sure you select manual set up -choosing 100 ISO. If you don't choose to manual your camera will not be working in a way where you've taken control of the camera and the exposure and the camera will continue to make decisions for you that will restrict your learning. Remember you need to learn by trial and error and by making mistakes and learning how to correct the mistakes. If you use this approach you will gain a far better understanding of photography and light.
![]() |
| Figure 1. |
You've now gained control of your camera and the process of using the camera with the ISO set to 100 iso will give you a far greater understanding of light levels and exposure. The more you use your camera in this manner restricting yourself to 100 iso and 400 iso as much as you can, the greater your appreciation of light levels and exposure will be.
Once set, on the back of your camera (or on top), you'll see and be able to check to see that your camera is set to 100 ISO. (No.1) in figure 1. This must not be set to Auto. Again have a look at your manual if you're unsure of how to set this or speak to your teachers.
We're insisting that you do this in order for you to grasp the difference in light levels and quickly light fades away when you move around a subject or from one space to another. This is not apparent with our eyes. When we move from one room to another, or from indoors to outside, we're rarely that aware of how different the light is. Our eyes and brains work to makes sense of the light and make the transition from one light source to another seamless. Film and digital sensors cannot do this in the same way that our eyes do, but when a DSLR camera is set on Auto ISO, I makes a damn good effort to do so and in doing so makes you lazy and unaware of how variable the light is. As light and the measurement of light is key to what we do as photographers it is essential that you appreciate the variation in light levels in your pursuit of images.
Shutter Speed.
Initially when you start to make images when you're learning we'll be advising you to always try and shoot at 1/125 of a second. This is your shutter speed. You'll be shown a demo using a Pentax K1000 where you'll see the shutter working and the affect it has when being used at different speeds.
It's the 1/125 is shutter speed that enables you to capture basic everyday movement, freezing it so that there is no blur. It's fast enough to also compensate for your own body movement so reducing 'Camera shake'.
In order to use the camera at this shutter speed you will have to be in a place where there is a lot of light. A lot of light basically means daylight outside. Anywhere else and you'll start to get problems, so when you start to shoot in this manner (ISO 100 at 1/125 shutter speed) always look to shoot your images in very bright light until you get some sense of how bright/dark different lighting conditions are.
The shutter speed is normally adjusted using the knurled wheel on the front or top of your camera body. Make the adjustments until it reaches the 1/125 shutter speed. This value is a speed at which the shutter allows the light to fall on to the cameras sensor to form the image.
Eventually we're now at the stage where you'll make an exposure calculation.
On your camera either on top of the body or on the menu display on the back of the camera you'll have feature that looks either like this..
Or like this...
You'll notice that both have a feature that looks like a dotted line with a + symbol at one end and a - symbol at the opposite end. This is your light metering system when you're using the camera in manual mode. When your dial is set to 'Manual' the display read out will include the large 'M' on the display to confirm that you're in 'Manual Mode'.
Note. The more you keep this simple when you start the quicker you'll learn the basics.
Subscribe to:
Posts (Atom)